Todo List - Django Python

Let's go! First you need to install Python, you can manage multiple versions using pyenv:
brew update
brew install pyenv
pyenv install 3.12.0
Django is a popular open source Python web framework. It was released in 2005 and is maintained by the Django Software Foundation.
- Based on the model-view-controller (MVC) pattern. This helps keep business logic, presentation logic, and data processing logic separated.
- Includes an ORM (Object Relational Mapper) that allows easily abstracting and mapping Python objects to databases.
- Offers a powerful template system based on simple syntax that enables separation between logic and presentation.
- Includes a ready-to-use user authentication and session management system.
- Auto-generated site administration available out of the box to easily manage content and users.
- Large community, many third party packages and good documentation available. To install Django, you can follow the documentation.
> python -m pip install Django
> python -m django --version
4.2.7
Django Rest Framework (DRF) is a popular package that integrates with Django to facilitate building APIs.
- DRF is built on top of Django and leverages many of its features like the authentication system and ORM.
- It allows quickly creating scalable web APIs using Django concepts like models and views.
- Adds features specific to building APIs like data serialization, HTTP request throttling, pagination and rate limiting.
- Uses generic class-based views to handle common API requests like listing, detailing, creating, deleting and updating data.
- Provides serializers that translate between complex Python representations and native web representations like JSON.
- Includes authentication and permission tools specific to APIs.
To manage the packages of our application we will use the package manager called Poetry.
Now let's start our project
mkdir todo_list
cd todo_list
Let's initialize Poetry:
poetry init -n
And add Django, DRF and a package to work with JWT:
poetry add django djangorestframework djangorestframework-simplejwt
Now let's activate the Poetry shell environment:
poetry shell
And we create our project:
django-admin startproject todo_project .
In Django we can have different apps/modules and so we will create our todo tasks (todos) and user management (users) apps
mkdir todo_project/auth
python manage.py startapp todos
python manage.py startapp users
Add the apps and rest_framework to the INSTALLED_APPS array in settings.py
INSTALLED_APPS = [
    'django.contrib.admin',
    'django.contrib.auth',
    'django.contrib.contenttypes',
    'django.contrib.sessions',
    'django.contrib.messages',
    'django.contrib.staticfiles',
    'rest_framework', #ADDED
    'auth', #ADDED
    'users', #ADDED
]
In this step we will execute the migrations
poetry run python manage.py migrate
You will see that a sqlite database will be created at the root of the project.
And you can run the application with the command:
python manage.py runserver
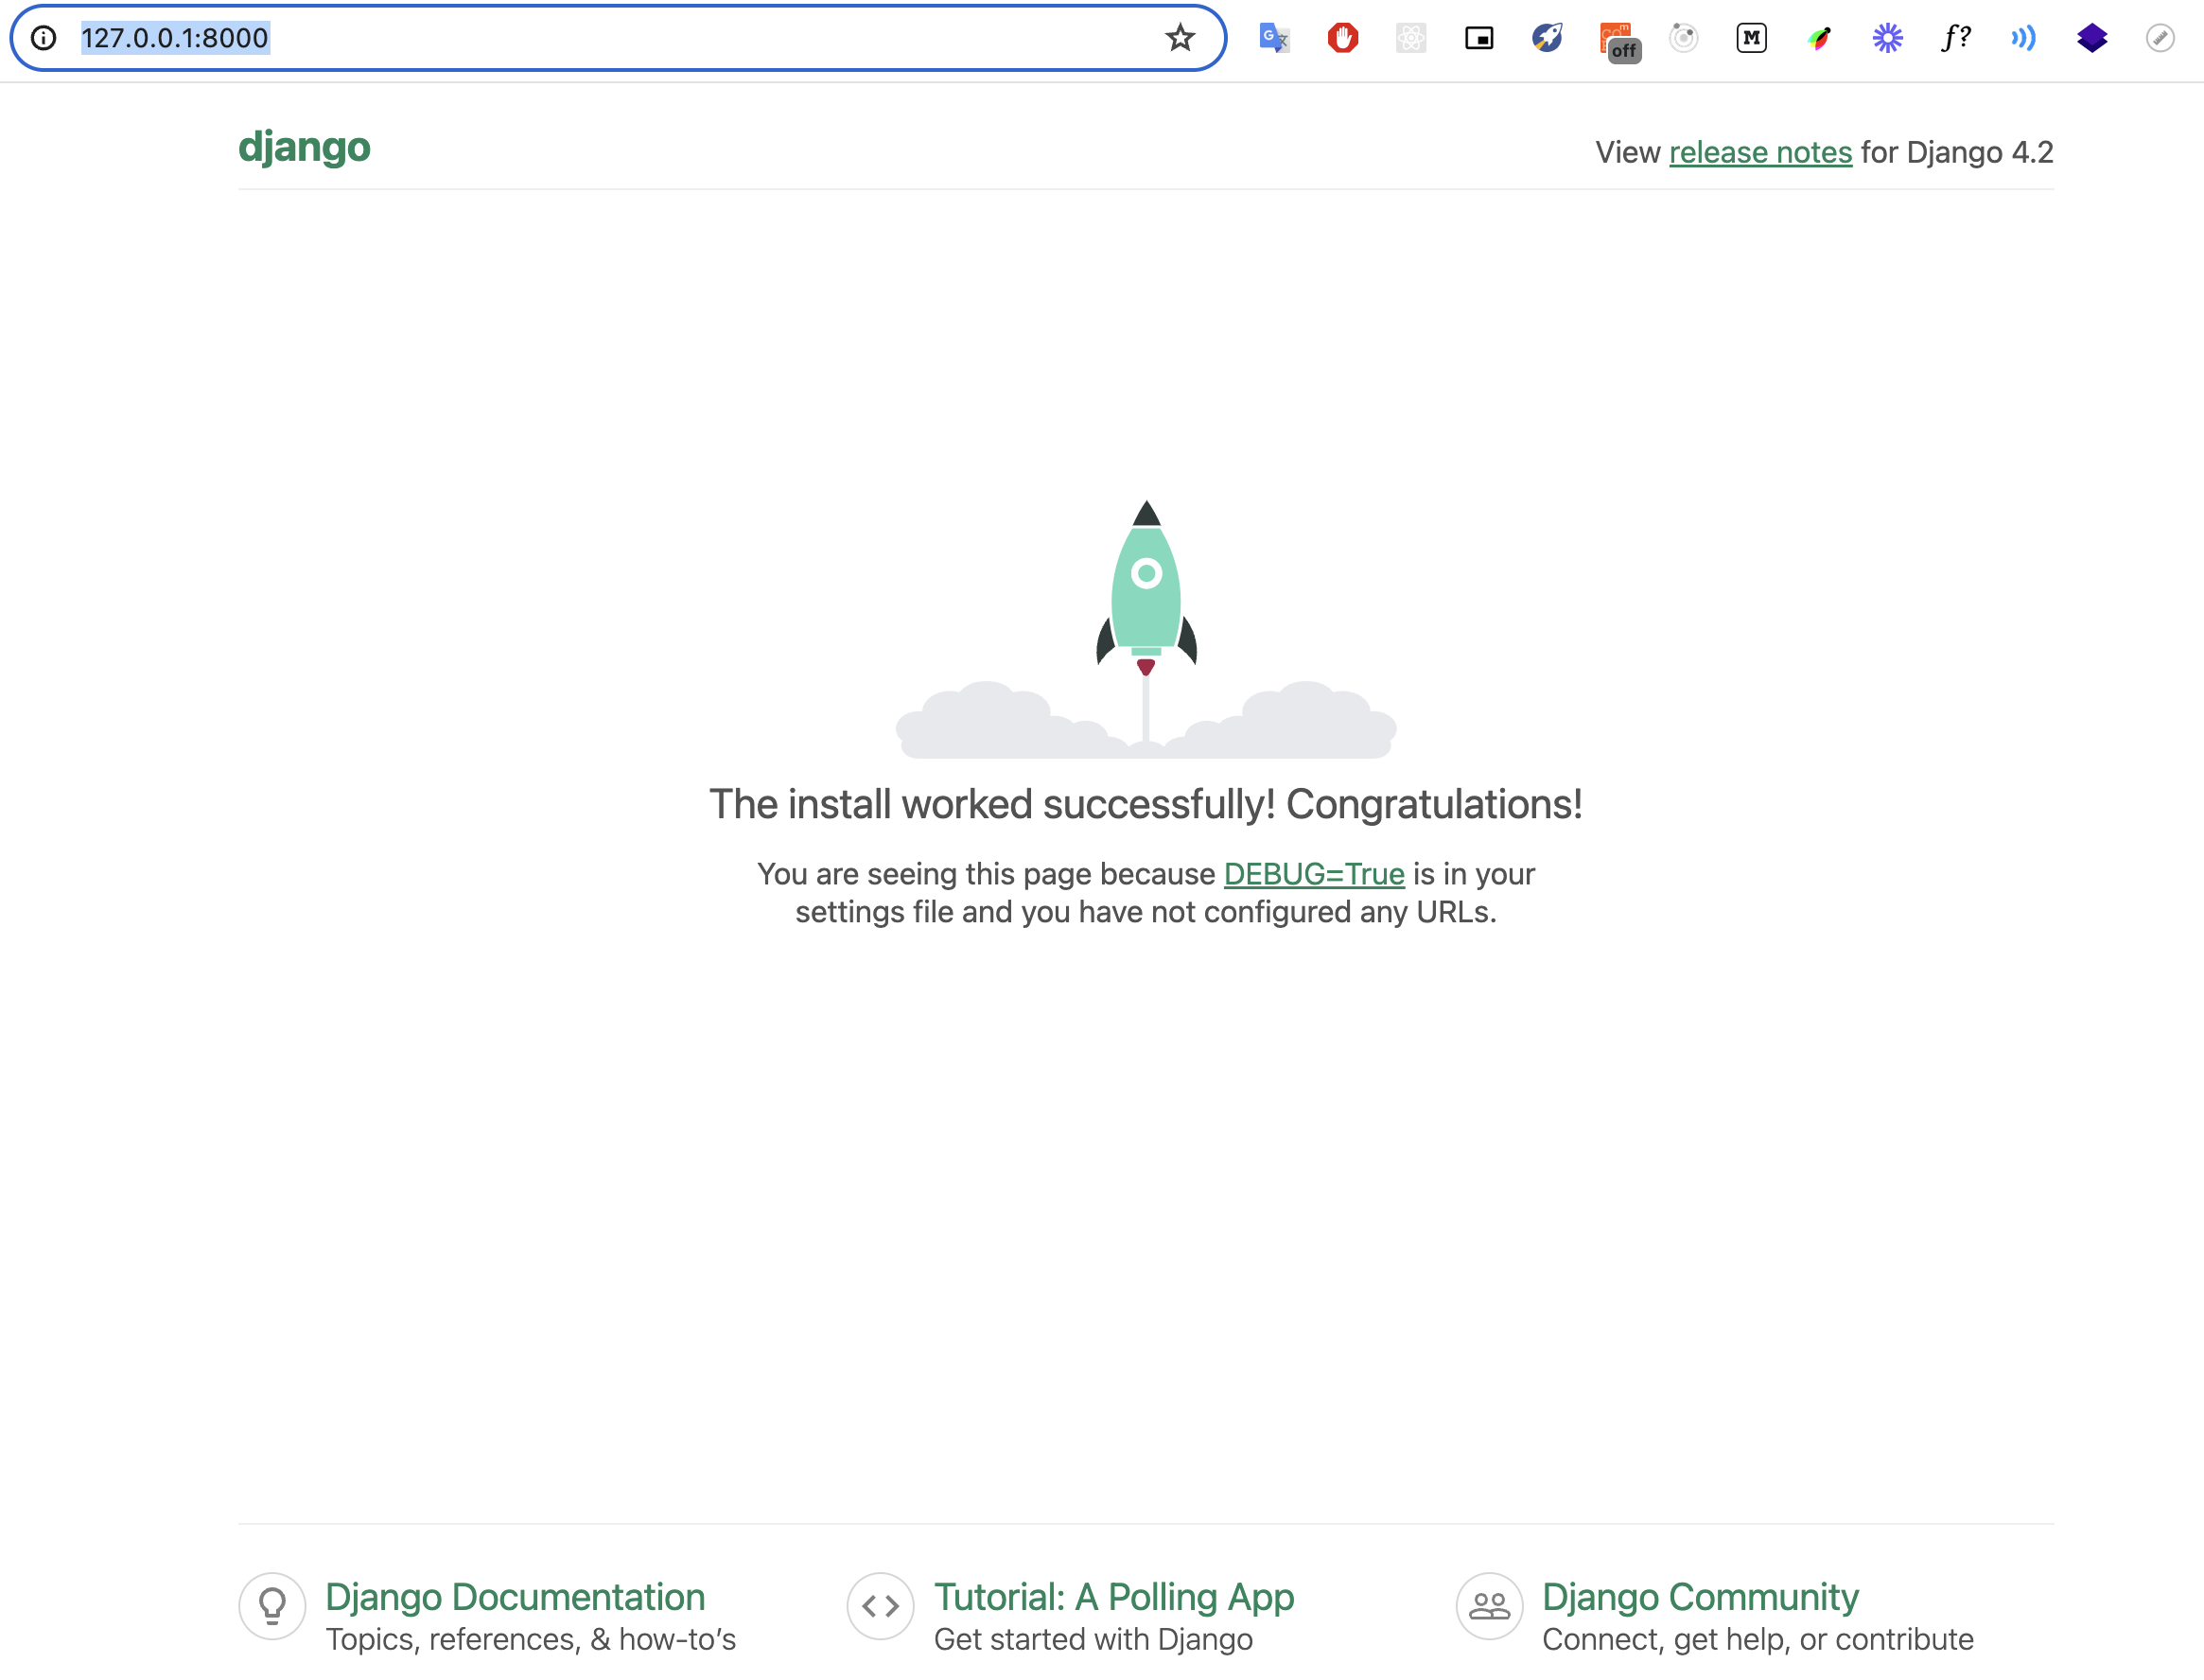
Now you can access the application:
http://127.0.0.1:8000
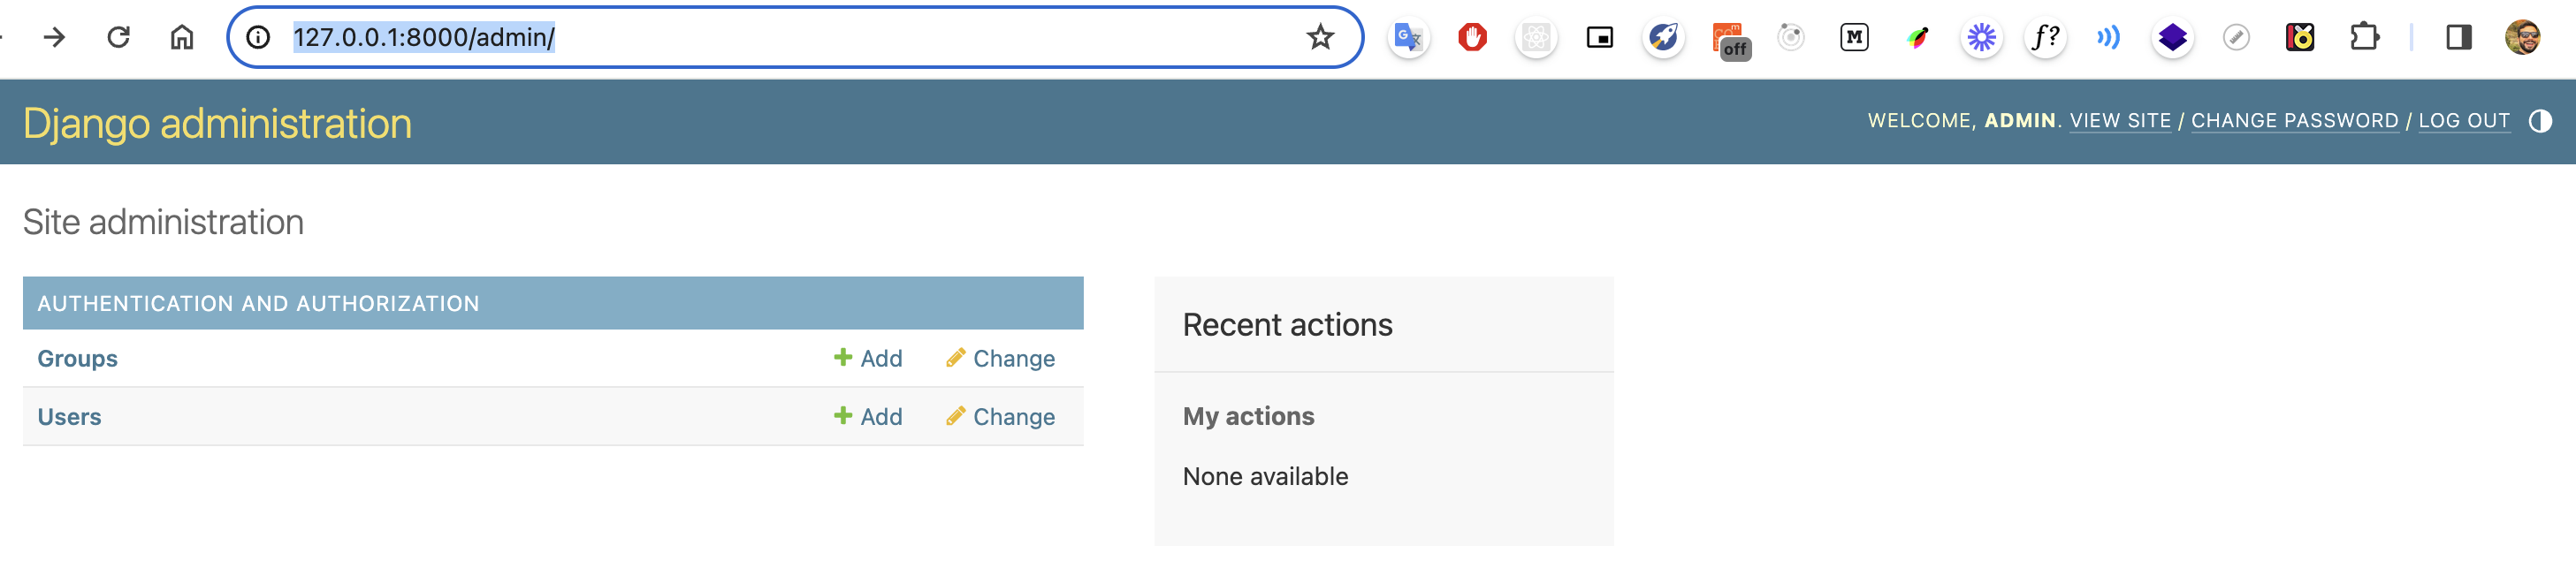
You can also access the admin panel, but first you need to create a superuser:
poetry run python manage.py createsuperuser
USERS APP
First, let's create a custom User model in case we need to expand the default properties. The models.py file will look like this:
from django.contrib.auth.models import AbstractUser
from .managers import CustomUserManager
from django.contrib.auth.models import UserManager

class CustomUserManager(UserManager):
    pass;

class CustomUser(AbstractUser):
    objects = CustomUserManager()

    def __str__(self):
        return f"Username: {self.username} <Email: {self.email}>"
We will have two serializers, one to create the user and another to change the user's password, so create the serializers.py file:
from rest_framework import serializers
from .models import CustomUser

class RegistrationSerializer(serializers.ModelSerializer):
    password2 = serializers.CharField(style={"input_type": "password"}, write_only=True)

    class Meta:
        model = CustomUser
        fields = ['username','email', 'password', 'password2']
        extra_kwargs = {
            'password': {'write_only': True}
        }

    def save(self):
        user = CustomUser(username=self.validated_data['username'],email=self.validated_data['email'])
        password = self.validated_data['password']
        password2 = self.validated_data['password2']
        if password != password2:
            raise serializers.ValidationError({'password': 'Passwords must match.'})
        user.set_password(password)
        user.save()
        return user

class PasswordChangeSerializer(serializers.Serializer):
    current_password = serializers.CharField(style={"input_type": "password"}, required=True)
    new_password = serializers.CharField(style={"input_type": "password"}, required=True)

    def validate_current_password(self, value):
        if not self.context['request'].user.check_password(value):
            raise serializers.ValidationError({'current_password': 'Does not match'})
        return value
In the application user views we will create our user CRUD:
from django.contrib.auth import authenticate, login, logout
from rest_framework import status
from rest_framework.permissions import IsAuthenticated
from rest_framework.response import  Response
from rest_framework.views import APIView
from .serializers import RegistrationSerializer, PasswordChangeSerializer
from rest_framework_simplejwt.tokens import RefreshToken

def get_tokens_for_user(user):
    refresh = RefreshToken.for_user(user)

    return {
        'refresh': str(refresh),
        'access': str(refresh.access_token),
    }

class RegistrationView(APIView):
    def post(self, request):
        serializer = RegistrationSerializer(data=request.data)
        if serializer.is_valid():
            serializer.save()
            return Response(serializer.data, status=status.HTTP_201_CREATED)
        return Response(serializer.errors, status=status.HTTP_400_BAD_REQUEST)

class LoginView(APIView):
    def post(self, request):
        if 'username' not in request.data or 'password' not in request.data:
            return Response({'msg': 'Credentials missing'},          status=status.HTTP_400_BAD_REQUEST)
        username = request.data.get('username')
        password = request.data.get('password')
        user = authenticate(request, username=username, password=password)
        if user is not None:
            login(request, user)
            auth_data = get_tokens_for_user(request.user)
            return Response({'msg': 'Login Success', **auth_data}, status=status.HTTP_200_OK)
        return Response({'msg': 'Invalid Credentials'}, status=status.HTTP_401_UNAUTHORIZED)

class LogoutView(APIView):
    def post(self, request):
        logout(request)
        return Response({'msg': 'Successfully Logged out'}, status=status.HTTP_200_OK)

class ProfileView(APIView):
    permission_classes = [IsAuthenticated, ]

    def get(self, request):
        user = request.user
        data = {
            'id': user.id,
            'username': user.username,
            'first_name': user.first_name,
            'last_name': user.last_name,
            'email': user.email
        }
        return Response(data, status=status.HTTP_200_OK)

class ChangePasswordView(APIView):
    permission_classes = [IsAuthenticated, ]

    def post(self, request):
        serializer = PasswordChangeSerializer(context={'request': request}, data=request.data)
        serializer.is_valid(raise_exception=True)
        request.user.set_password(serializer.validated_data['new_password'])
        request.user.save()
        return Response(status=status.HTTP_204_NO_CONTENT)
Now let's expose these views in the URLs:
from django.urls import path
from .views import RegistrationView, LoginView, LogoutView, ChangePasswordView, ProfileView
from rest_framework_simplejwt import views as jwt_views

app_name = 'users'

urlpatterns = [
    path('register', RegistrationView.as_view(), name='register'),
    path('login', LoginView.as_view(), name='login'),
    path('me', ProfileView.as_view(), name='profile'),
    path('logout', LogoutView.as_view(), name='logout'),
    path('change-password', ChangePasswordView.as_view(), name='password'),
    path('token-refresh/', jwt_views.TokenRefreshView.as_view(), name='token_refresh'),
]
We will also add some authentication settings to the settings.py file in the todo_project folder:
REST_FRAMEWORK = {
    # Use Django's standard `django.contrib.auth` permissions,
    # or allow read-only access for unauthenticated users.
    'DEFAULT_PERMISSION_CLASSES': [
        'rest_framework.permissions.AllowAny'
    ],
    'DEFAULT_AUTHENTICATION_CLASSES': [
        'rest_framework_simplejwt.authentication.JWTAuthentication',
    ]
}

SIMPLE_JWT = {
    'ACCESS_TOKEN_LIFETIME': datetime.timedelta(days=1),
    'REFRESH_TOKEN_LIFETIME': datetime.timedelta(days=1),
}

AUTH_PROFILE_MODULE = 'users.CustomUser'

AUTH_USER_MODEL = 'users.CustomUser'
TODOS APP
Create the todo model in the models.py file of the todos module:
from django.db import models

class Todo(models.Model):
    title = models.TextField()
    description = models.TextField(null=True, blank=True)
    date_created = models.DateTimeField(auto_now_add=True)
    date_modified = models.DateTimeField(auto_now=True)
    is_completed = models.BooleanField(default=False)
    owner = models.ForeignKey(
      'users.CustomUser',
      related_name='todos',
      on_delete=models.CASCADE,
    )

    def __str__(self):
      return f"Title: {self.title} <Completed: {self.is_completed}>"
Create the serializers.py file:
from rest_framework import serializers
from .models import Todo

class TodoSerializer(serializers.ModelSerializer):
    class Meta:
        fields = (
            'id',
            'title',
            'description',
            'is_completed',
            'owner',
        )
        model = Todo
And now let's make the CRUD views for the todos:
from rest_framework import viewsets, status
from rest_framework.response import Response
from rest_framework.permissions import IsAuthenticated

from .models import Todo
from .serializers import TodoSerializer

class TodoViewSet(viewsets.ModelViewSet):
    permission_classes = [IsAuthenticated]
    serializer_class = TodoSerializer

    def get_queryset(self):
        return Todo.objects.filter(owner=self.request.user)

    def perform_create(self, serializer):
        serializer.save(owner=self.request.user)

    def destroy(self, request, *args, **kwargs):
        todo = self.get_object()
        if todo.owner == request.user:
            todo.delete()
            return Response(status=status.HTTP_204_NO_CONTENT)
        else:
            return Response(status=status.HTTP_404_NOT_FOUND)

    def partial_update(self, request, *args, **kwargs):
        todo = self.get_object()
        if todo.owner != request.user:
            return Response(status=status.HTTP_404_NOT_FOUND)

        serializer = self.get_serializer(todo, data=request.data, partial=True)
        serializer.is_valid(raise_exception=True)
        serializer.save()

        return Response(serializer.data)
Now we need to generate and run the todo model migration:
poetry run python manage.py makemigrations
python manage.py migrate
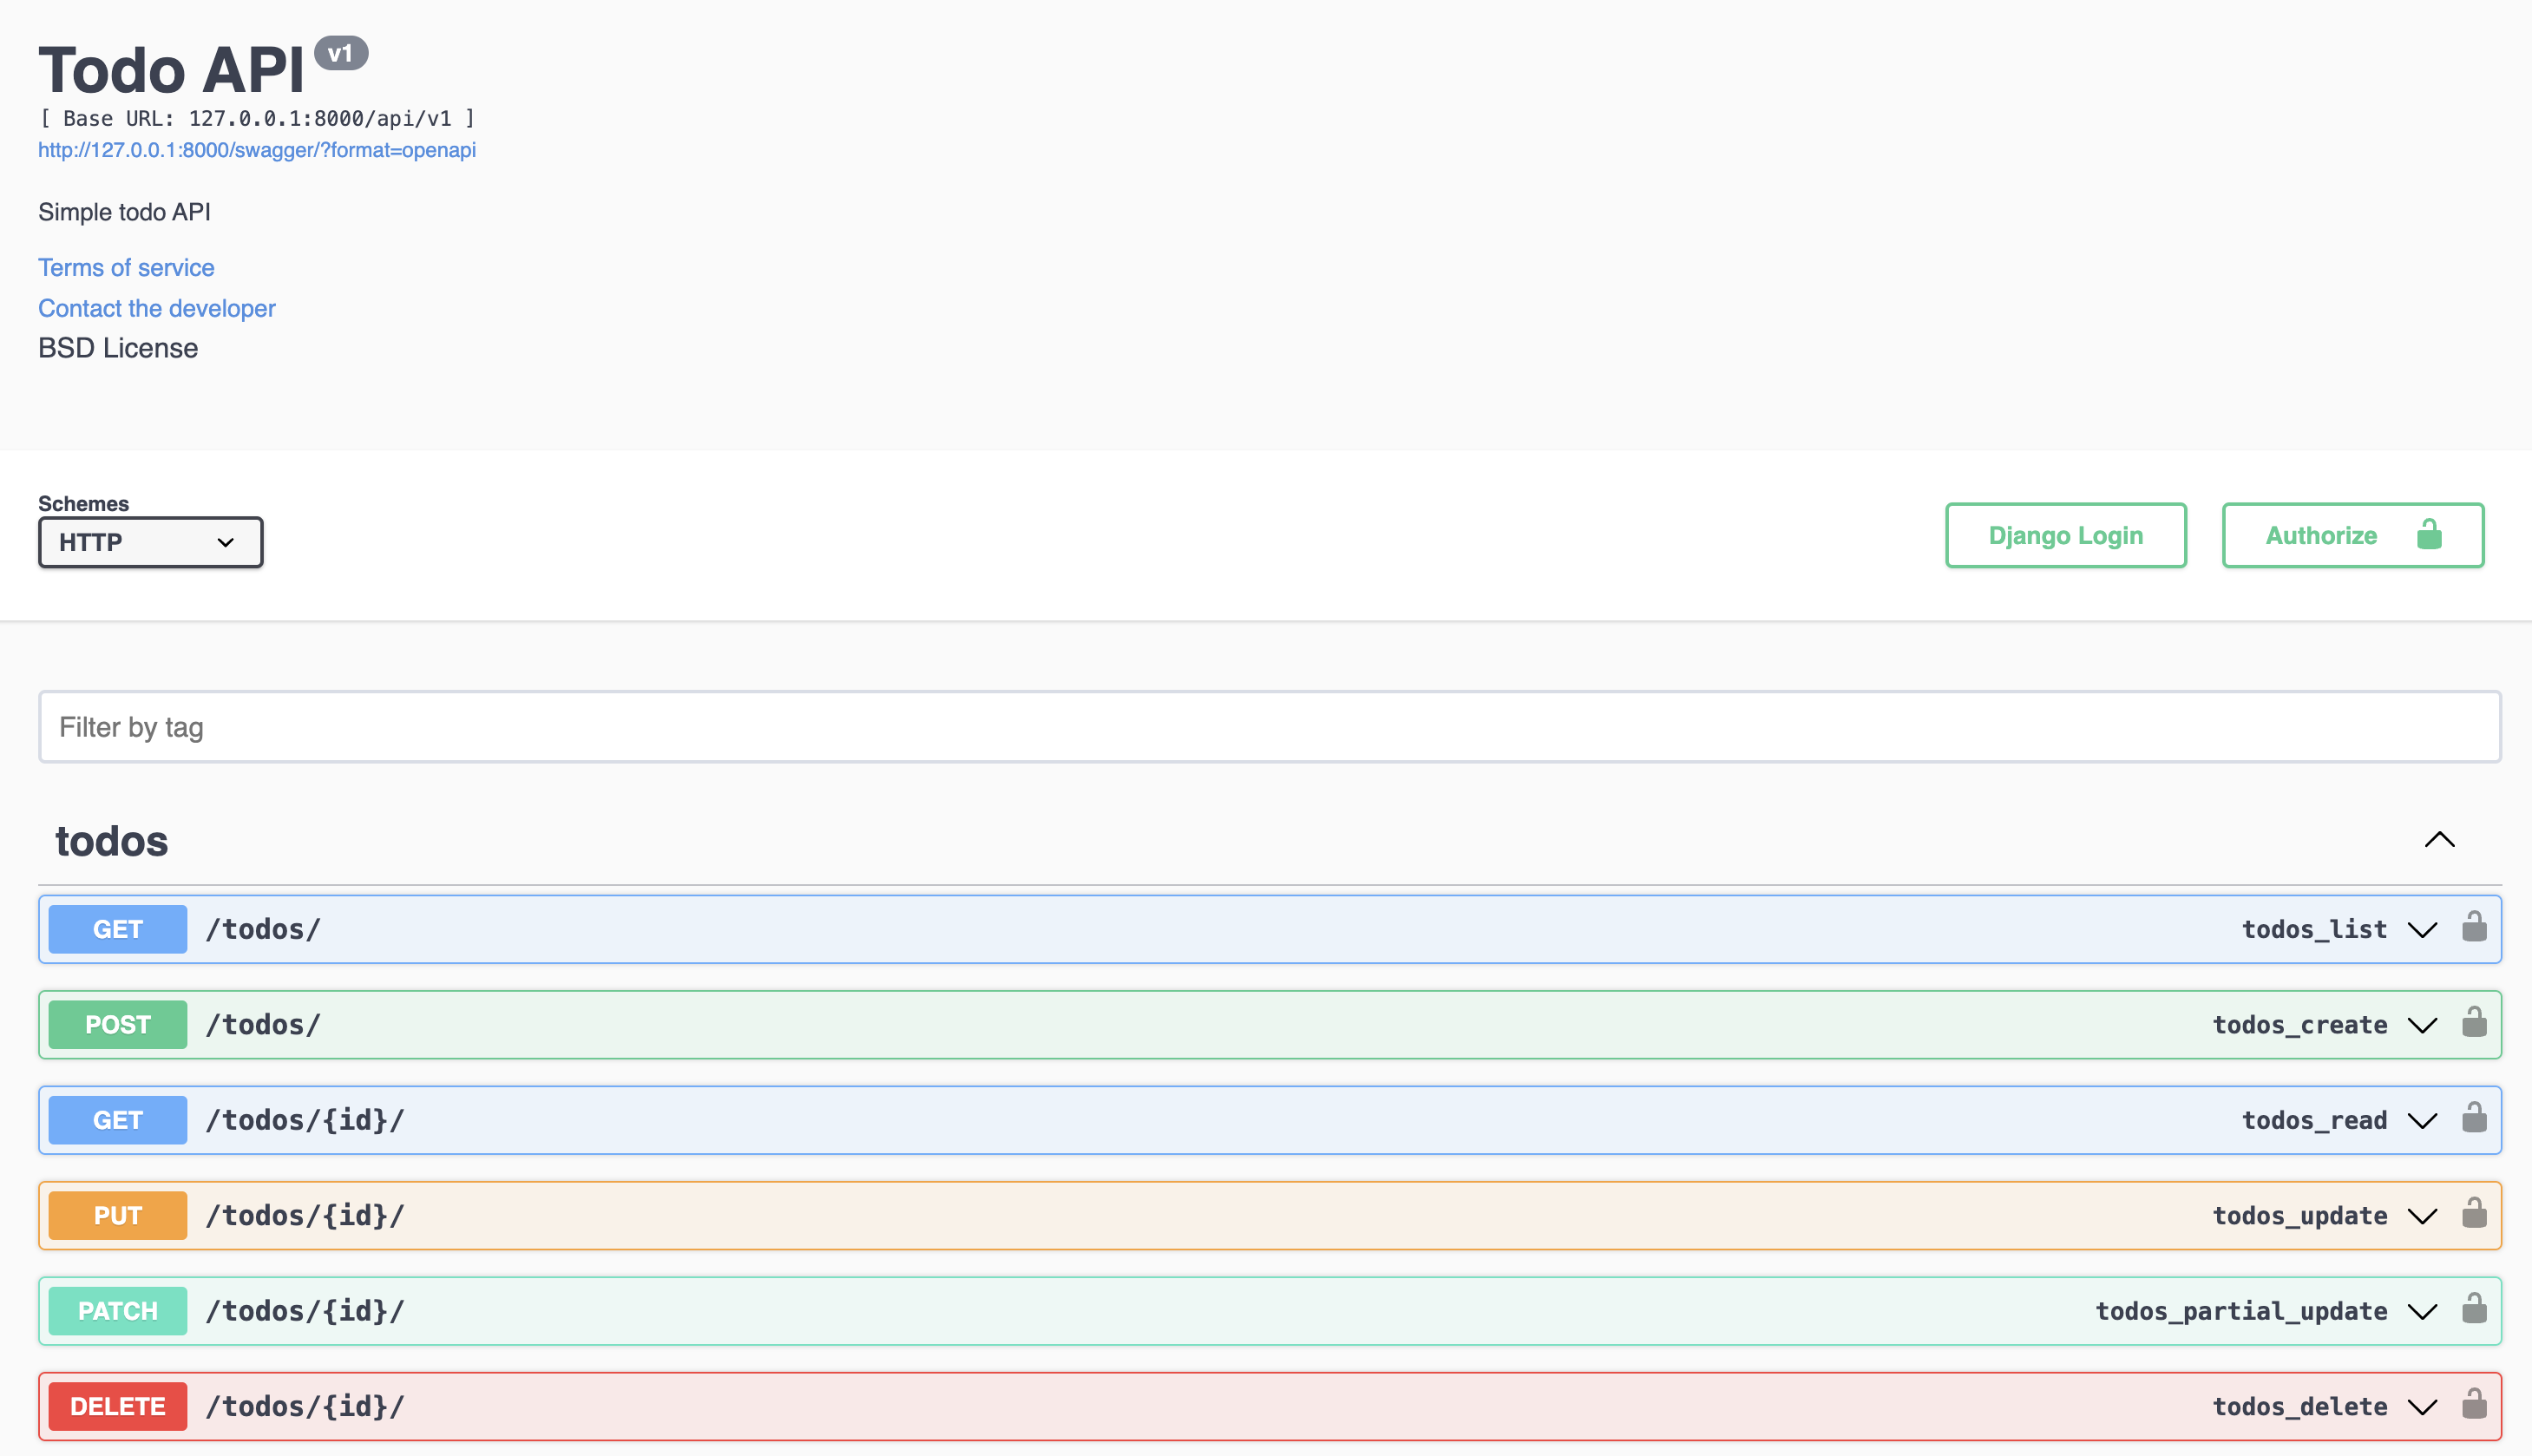
Documentation
Let's add a library to generate our documentation automatically:
poetry add drf-yasg
Add to the settings.py file:
INSTALLED_APPS = [
    'django.contrib.admin',
    'django.contrib.auth',
    'django.contrib.contenttypes',
    'django.contrib.sessions',
    'django.contrib.messages',
    'django.contrib.staticfiles',
    'rest_framework',
    'drf_yasg', # ADDED
    'users',
    'todos',
]
And our urls.py file will look like this, with the documentation routes:
from django.contrib import admin
from django.urls import path, include
from rest_framework import permissions
from drf_yasg.views import get_schema_view
from drf_yasg import openapi

schema_view = get_schema_view(
    openapi.Info(
        title="Todo API",
        default_version='v1',
        description="Simple todo API",
        terms_of_service="https://www.google.com/policies/terms/",
        contact=openapi.Contact(email="me@abilioazevedo.com.br"),
        license=openapi.License(name="BSD License"),
    ),
    public=True,
    permission_classes=(permissions.AllowAny,),
)

urlpatterns = [
    path('swagger<format>/', schema_view.without_ui(cache_timeout=0), name='schema-json'),
    path('swagger/', schema_view.with_ui('swagger', cache_timeout=0), name='schema-swagger-ui'),
    path('redoc/', schema_view.with_ui('redoc', cache_timeout=0), name='schema-redoc'),
    path('admin/', admin.site.urls),
    path("api/v1/users/", include("users.urls"), name="users"),
    path("api/v1/", include("todos.urls"), name="todos")
]
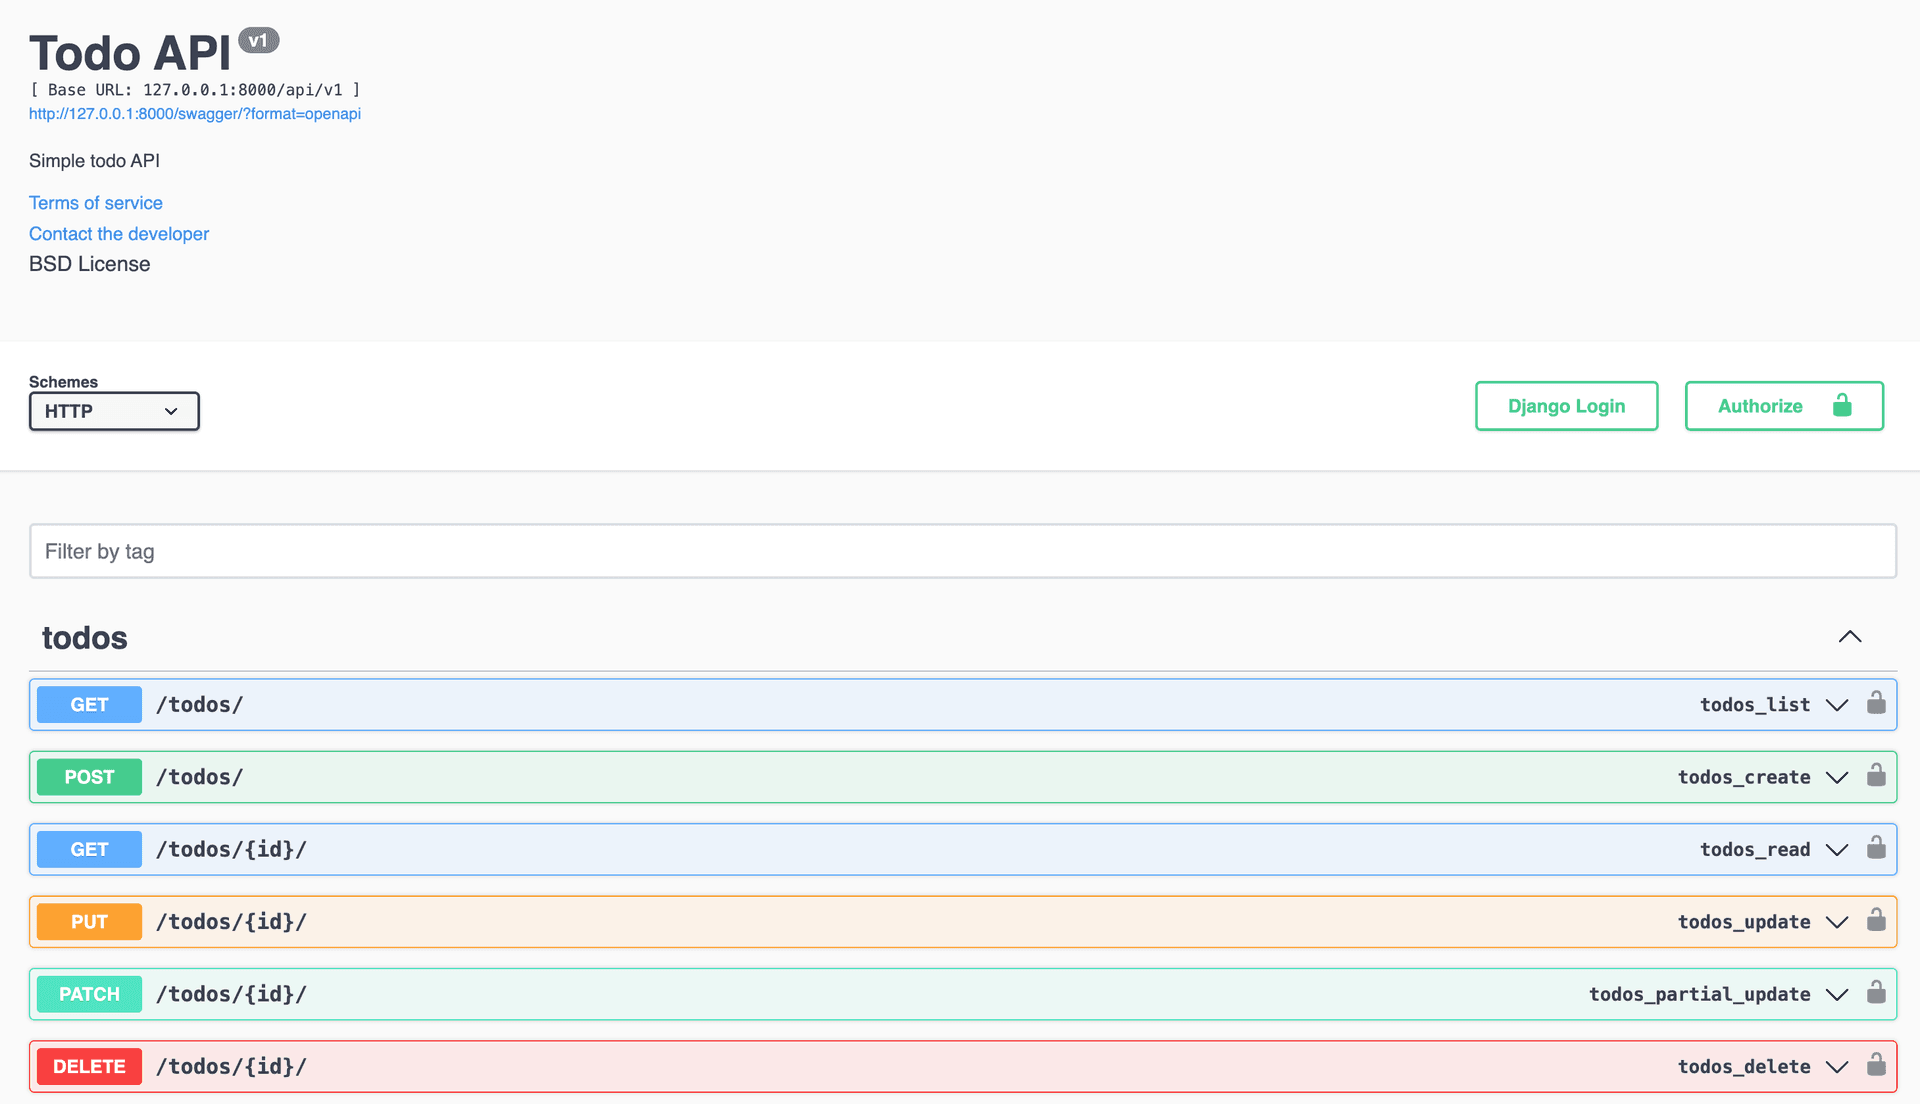
Now just access: http://127.0.0.1:8000/swagger/.
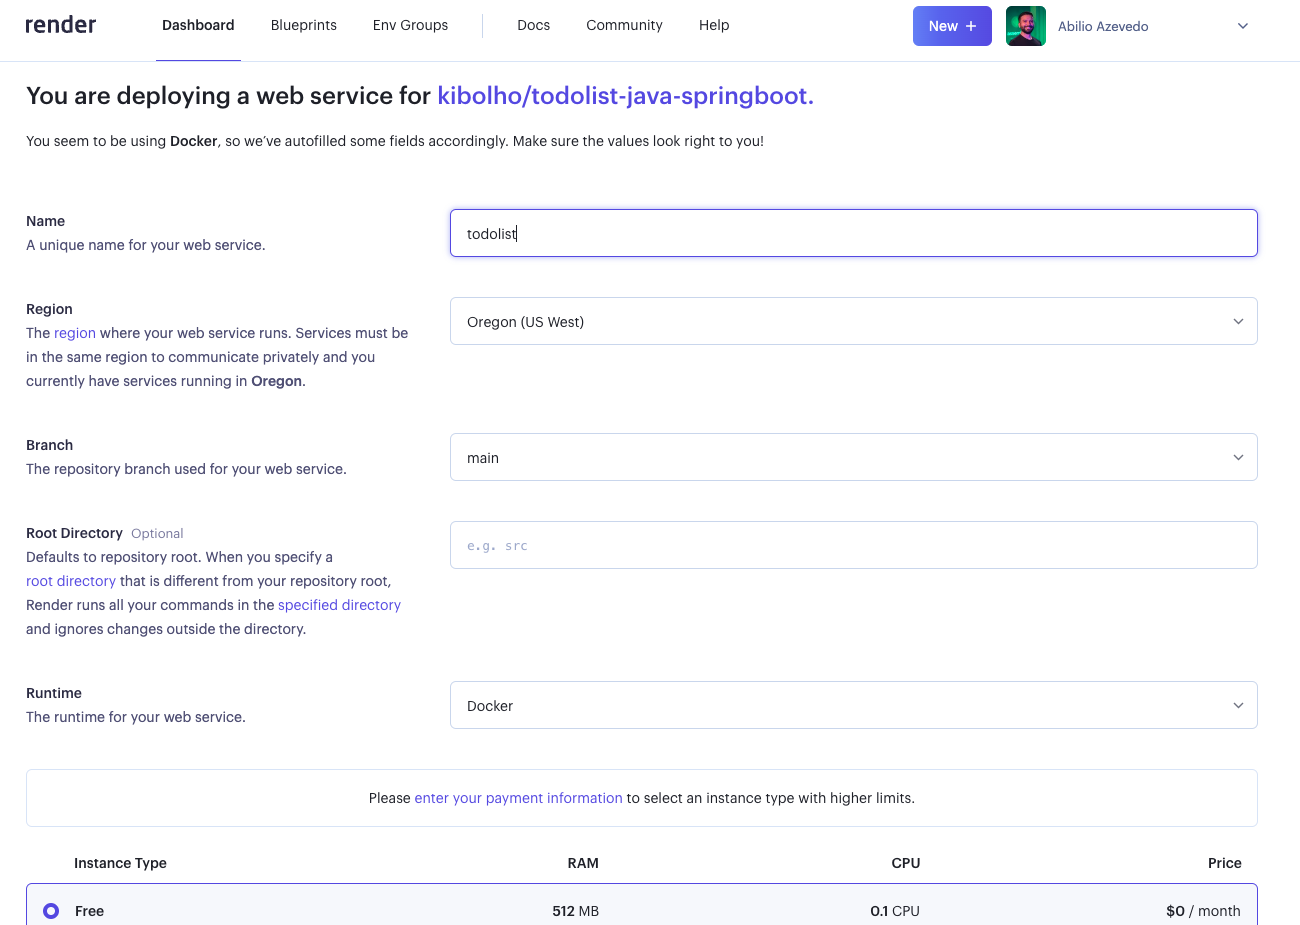
Deploy it
You can use https://render.com/ to deploy your application, you just need to connect your repository and deploy it using Docker.
- Access the render to create your web application: https://dashboard.render.com/create?type=web

You can test it here
Extra Commands
To check for database migrations
poetry run python manage.py showmigrations
If the migration has already been made but Django has not marked it as done, you can perform it falsely:
poetry run python manage.py migrate --fake transactions 0009
Go to a specific migration
poetry run python manage.py migrate app_name 0003
To print some information you can use the function:
print(obj)
Here is the translation to English:
Run the python shell:
poetry run python manage.py shell_plus
Inside the shell we can import and execute files:
from .models import Todo

todo = Todo(title='Create a todo list', description="Using Django")

todo.save()

print(Todo.objects.all())
This opens the Django shell_plus, which allows executing code in the context of the Django project.
Inside the shell, it imports the Todo model, creates a new Todo object, saves it to the database and prints all Todo objects.
The shell_plus is useful for interactively testing and debugging Django code and functionality during development.
Django proxy models
Django proxy models allow you to modify the behavior of an existing model without creating a new database table. Key points:
-
Purpose: Add methods or change the default manager without altering the database schema.
-
Usage: Inherit from an existing model and set Meta.proxy = True.
-
Limitations: Cannot add new fields or change existing ones.
-
Use cases:
- Adding custom methods
- Modifying the default manager
- Changing model metadata (e.g., default ordering)
- Benefits:
- Code organization
- Behavior customization without database changes
Example:
from django.db import models

class Person(models.Model):
    name = models.CharField(max_length=100)

class VIPPerson(Person):
    class Meta:
        proxy = True

    def get_vip_status(self):
        return "VIP"
Let me continue the blog post with information about Django's Generic Foreign Keys:
Generic Foreign Keys in Django
Generic Foreign Keys provide a flexible way to create relationships between models without explicitly specifying the target model. This powerful feature allows a model to hold references to any other model in your Django application.
- Core Components:
from django.contrib.contenttypes.fields import GenericForeignKey
from django.contrib.contenttypes.models import ContentType

class Comment(models.Model):
    content_type = models.ForeignKey(ContentType, on_delete=models.CASCADE)
    object_id = models.PositiveIntegerField()
    content_object = GenericForeignKey('content_type', 'object_id')
    text = models.TextField()
- Use Cases:
- Comments system that works across multiple models
- Tagging functionality for different types of content
- Activity streams tracking actions on various objects
- Generic attachments or metadata storage
- Accessing Related Objects:
# Creating relationships
post = BlogPost.objects.get(id=1)
comment = Comment(content_object=post, text="Great post!")
comment.save()

# Retrieving the related object
content_object = comment.content_object  # Returns the BlogPost instance
- Reverse Generic Relations:
from django.contrib.contenttypes.fields import GenericRelation

class BlogPost(models.Model):
    title = models.CharField(max_length=100)
    comments = GenericRelation(Comment)

# Query comments directly from the BlogPost
post.comments.all()
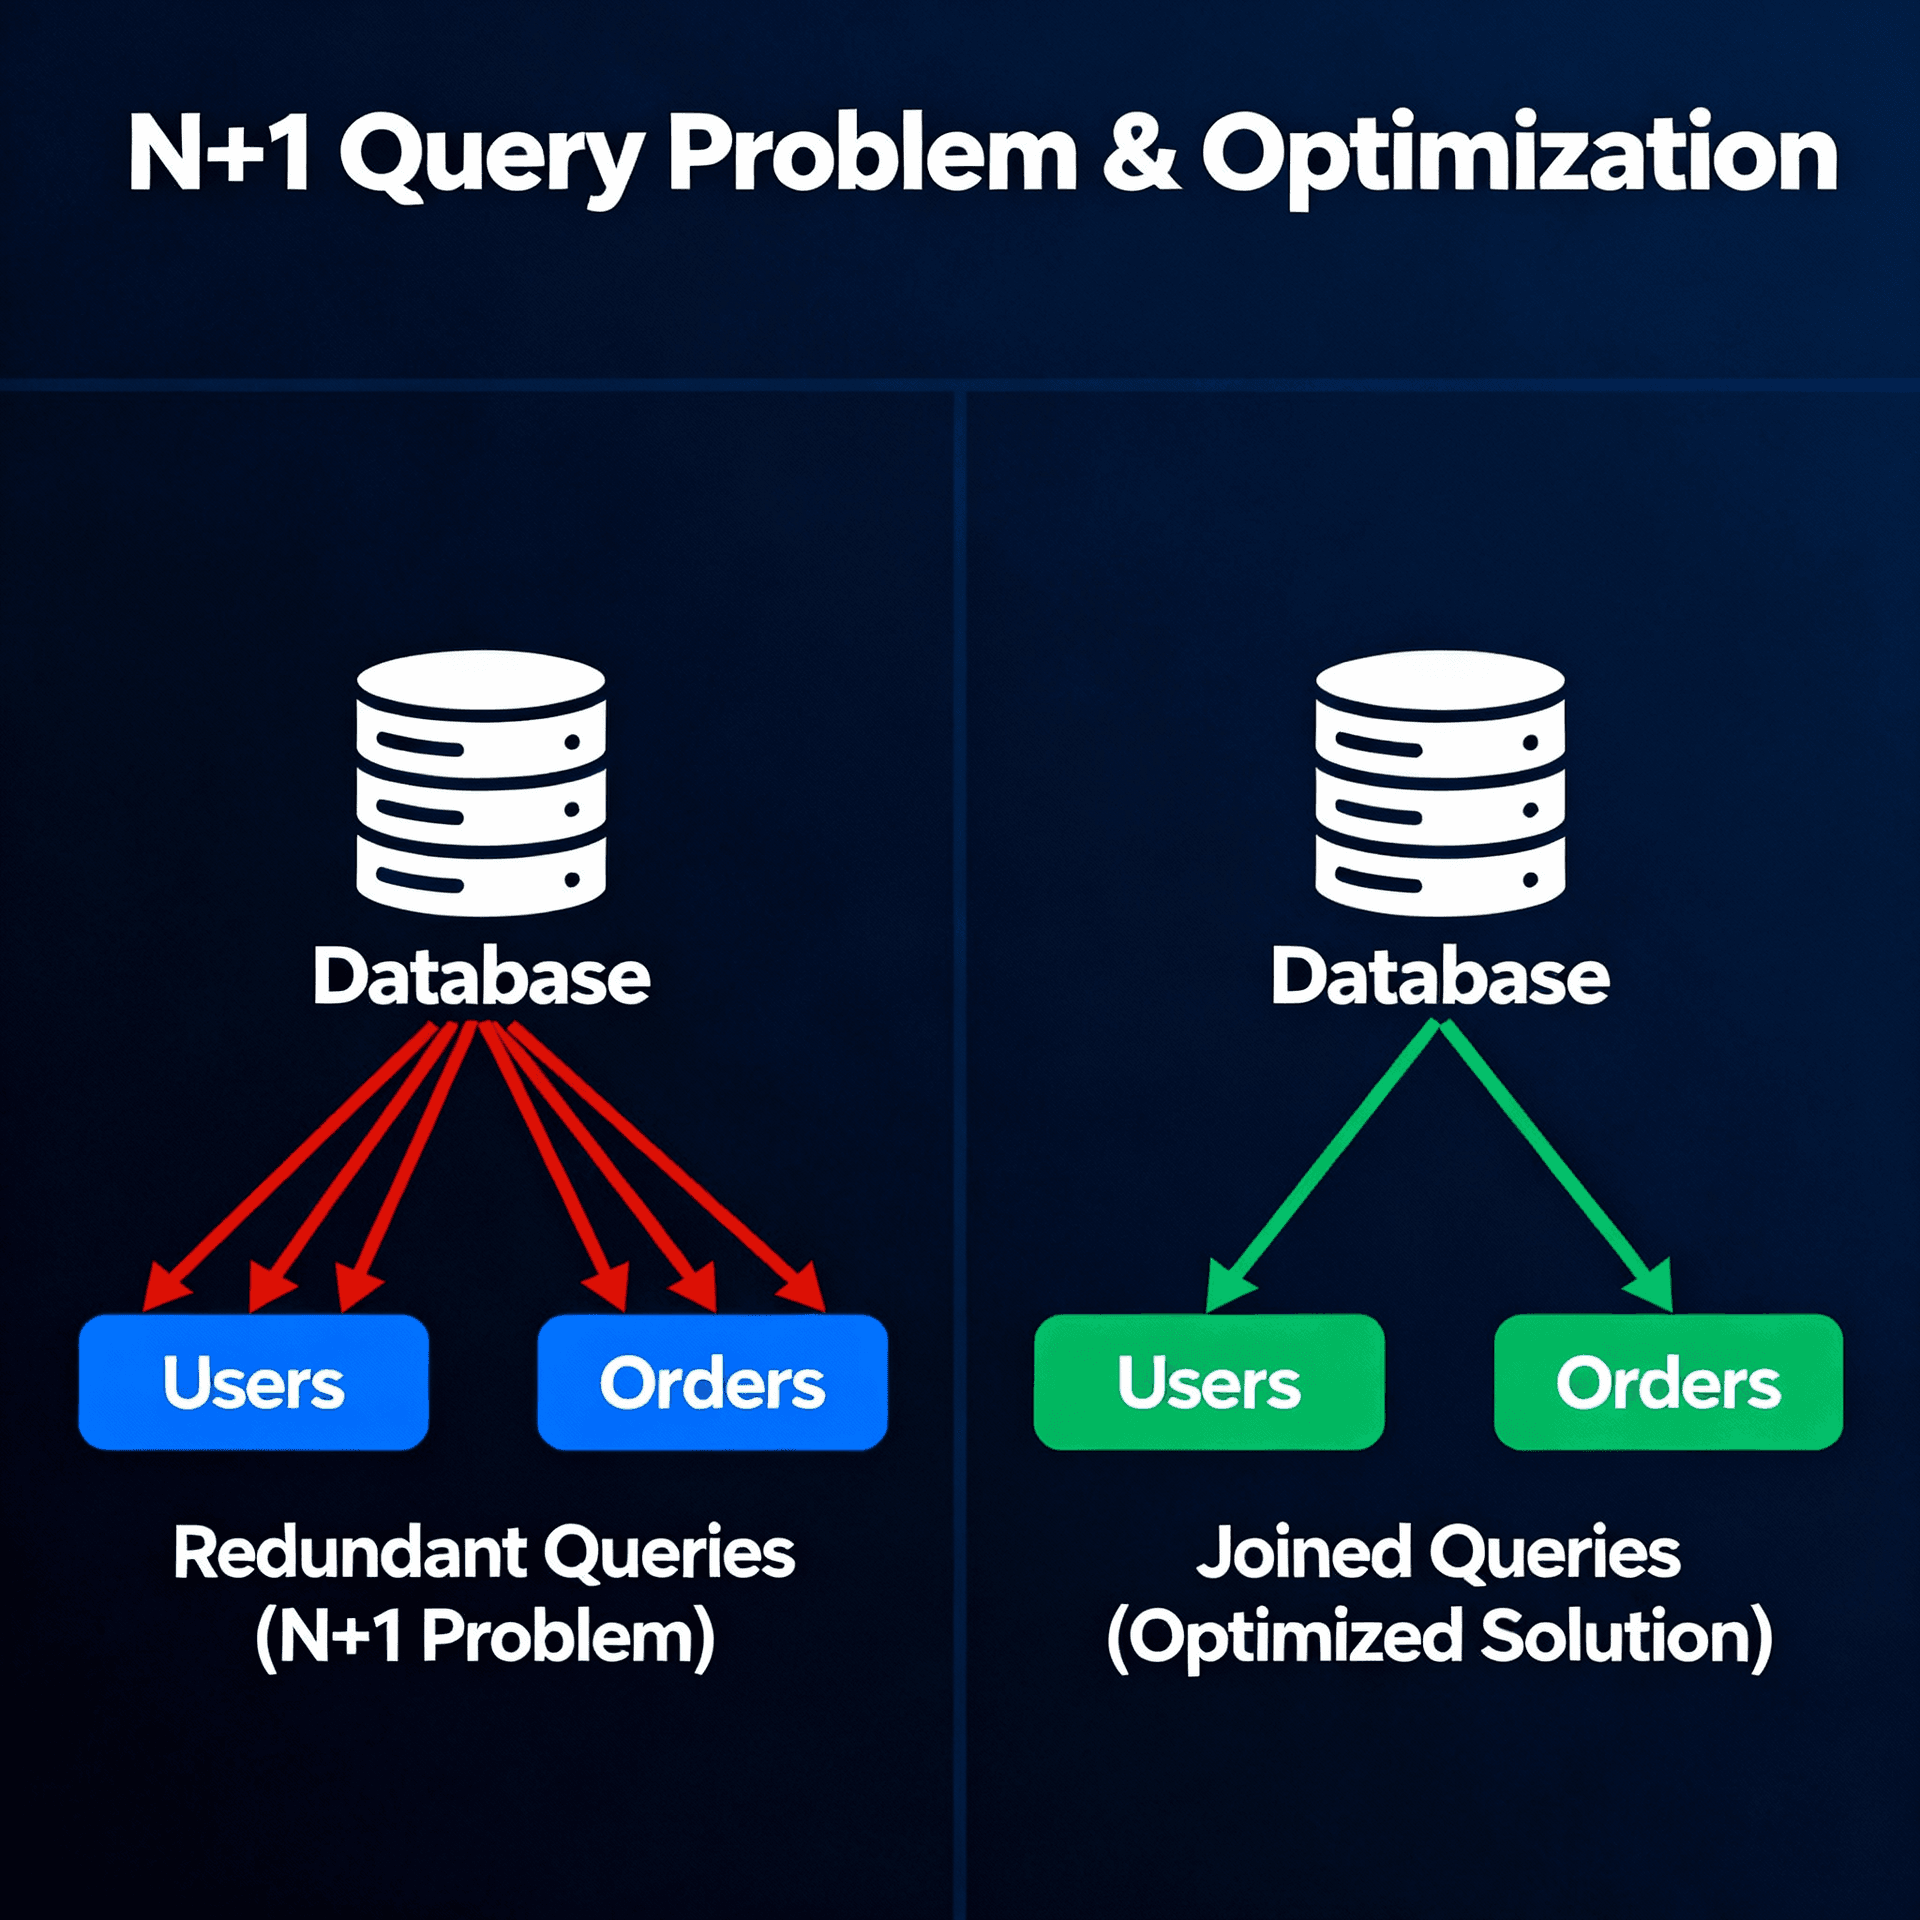
- Performance Considerations:
- Generic relations require additional database queries
- Use
prefetch_related()to optimize querying related objects - Consider denormalization for frequently accessed data
- Best Practices:
- Use conventional foreign keys when the related model is known
- Index the
content_typeandobject_idfields for better performance - Implement proper database constraints where possible
- Consider using
limit_choices_toto restrict content types
- Example: Activity Stream Implementation
class Activity(models.Model):
    user = models.ForeignKey('auth.User', on_delete=models.CASCADE)
    verb = models.CharField(max_length=255)
    created_at = models.DateTimeField(auto_now_add=True)

    # Generic FK to the target object
    target_content_type = models.ForeignKey(ContentType, on_delete=models.CASCADE,
                                          related_name='target_activities')
    target_object_id = models.PositiveIntegerField()
    target = GenericForeignKey('target_content_type', 'target_object_id')

    class Meta:
        ordering = ['-created_at']
        indexes = [
            models.Index(fields=['target_content_type', 'target_object_id']),
        ]
Generic Foreign Keys are particularly useful when building reusable Django applications that need to interact with models that aren't known at development time. However, they should be used judiciously as they can impact performance and make your database schema less strict.
For complex applications requiring extensive use of generic relations, consider using third-party packages like django-polymorphic or django-generic-relations that provide additional functionality and optimizations.
Remember that while Generic Foreign Keys offer great flexibility, they come with trade-offs:
- Reduced database integrity enforcement
- More complex queries
- Potential performance overhead
- Less explicit relationships in your code
Choose them when the benefits of model-agnostic relationships outweigh these considerations.
References
- Python community: https://jazzband.co/
- Profilling and Inspection tool: https://github.com/jazzband/django-silk