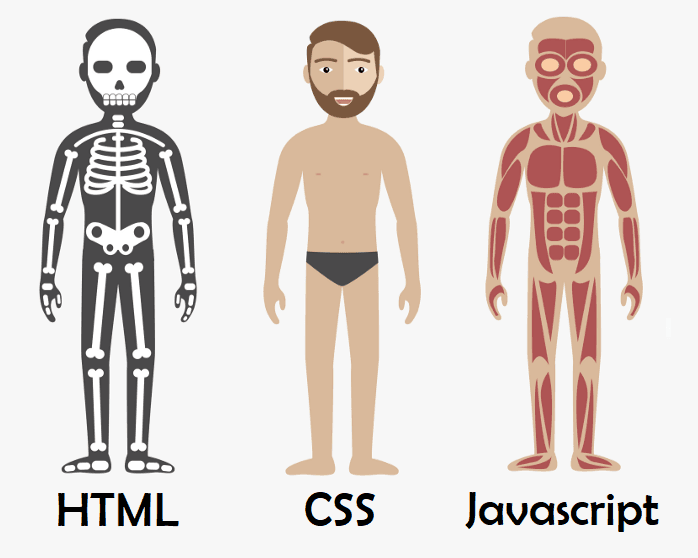
Frontend Web - HTML, CSS e Javascript

DOM
Here is an introductory article on the concept of DOM (Document Object Model) in JavaScript:
The DOM (Document Object Model) is a programming interface that represents HTML and XML documents as objects, allowing programs to access and modify the content, structure, and style of these documents dynamically.
The DOM is organized as a tree of nodes. The root node is the document itself. From there, we have elements, texts and comments as tree nodes. Each html tag becomes an element node, the text becomes text nodes, and the comments become comment nodes.
We can access these nodes and interact with them through JavaScript. For example, to change the text of a paragraph:
const paragraph = document.getElementById("myParagraph");
paragraph.innerText = "New paragraph text!";
Some common operations using the DOM are:
- Changing CSS styles of elements
- Changing HTML attributes
- Changing textual content of tags
- Creating new nodes and elements from scratch
- Removing and replacing existing elements
The DOM exposes an API that allows us to dynamically modify the structure, content, and appearance of HTML and XML documents after the page has loaded. It is an essential part of front-end programming with JavaScript.

HTML
HTML is a markup language used to structure content on the web. It uses tags to tell the browser how to display the content.
Basic Structure
The basic structure of an HTML document consists of the <html>, <head> and <body> tags:
<!DOCTYPE html>
<html lang="en">
<head>
  <meta charset="UTF-8">
  <title>Page Title</title>
</head>
<body>
  Visible page content
</body>
</html>
<!DOCTYPE html>- Document type declaration<html>- Root element<head>- Header with meta information<body>- Body with visible content
Headings and Paragraphs
<h1>to<h6>- Section headings<p>- Text paragraphs
Emphasis
<strong>- Bold emphasis<em>- Italic emphasis
Tables
A table has a structure with <tr> rows, <th> header, and <td> cells.
Forms
Allow collecting user information with elements such as:
<input>- Data entry boxes<select>- Dropdown lists<textarea>- Text areas<button>- Buttons
There are several types of <input>, such as text, email, number, date etc.
Semantic HTML
Semantics in HTML relates to using tags that define the meaning and structure of the page content. It is important for a few reasons:
Accessibility
Semantic tags like <header>, <nav>, <main>, <footer> allow assistive technologies like screen readers to better navigate and interpret the page. This improves the experience for users with disabilities.
SEO
Properly using semantic tags facilitates search engines in interpreting content, improving page rankings.
Maintenance
The code gets more organized, readable and easier to alter later. Since the tag meanings already describe themselves, the developer's job is easier.
Data Access
APIs and other forms of automated data access benefit from semantic tags to better extract and interpret page information.
Some important examples of semantic tags:
<header>- header<nav>- navigation links<main>- main content<section>- generic content section<article>- self-contained content<aside>- side content like sidebars<footer>- footer
Therefore, semantics improves not only for humans, but also machines, the interpretation and value of HTML markup.
CSS
Inline CSS
Inline CSS consists of adding styling directly in the HTML tag, through the "style" attribute. For example:
<p style="color: blue;">This paragraph will have blue font</p>
The style tag
The <style> tag allows defining CSS styles within the HTML page itself. Everything within this tag will affect the corresponding HTML elements.
<style>
p {
  color: red;
}
</style>
External CSS files
The ideal is to create separate .css files and import them in the HTML page. This allows better organization and reuse of styles.
<link rel="stylesheet" type="text/css" href="styles.css">
Cascade
CSS allows applying more than one style to the same element. The order of precedence is: inline > style tag > external file. If there are conflicts, the style defined lower in the code takes preference.
Importing CSS
To import an external CSS file, the <link> tag is used inside <head>:
<link rel="stylesheet" type="text/css" href="styles.css">
Colors in CSS
Colors can be defined by name:
color: blue;
Hexadecimal:
color: #0000ff;
Or RGB:
color: rgb(0,0,255);
Table styling
It's possible to change borders, fonts, row/column colors, spacing etc. For example:
table {
  border-collapse: collapse;
}

td {
  padding: 10px;
  border: 1px solid #ccc;
}
Float and clear
Float alters element positioning, "floating" it left or right. Clear clears the float.
img {
  float: right;
}

p {
  clear: right;
}
Background gradient
A gradient can be applied with the background property:
body {
  background: linear-gradient(to right, white, black);
}
Pseudo-elements
Allow styling specific parts of an element, like ::before and ::after.
Selectors
Several selectors allow refinements, like selecting direct child (>) or adjacent sibling (+).
CSS selectors allow selecting HTML elements to apply styles to them. The main ones are:
-
Element selector: selects elements according to the tag. Ex:
p { }selects all paragraphs. -
ID selector: selects an element by its id attribute. Ex:
#myDiv { }selects the element with id="myDiv". -
Class selector: selects elements that have a certain class value. Ex:
.error { }selects elements with class="error". -
Attribute selector: selects elements that have a certain attribute. Ex:
[autofocus] { }selects elements with the autofocus attribute. -
Universal selector: selects all elements on a page. It is represented by *. Ex:
* { }. -
Child selector: represented by
>. Only selects direct child elements. Ex:article > p { }only selectspwhen direct children ofarticle. -
Adjacent sibling selector: represented by
+. Selects the element that is immediately after another element. Ex:h1 + p { }selects the firstpafter eachh1. -
General sibling selector: represented by
~. Selects all sibling elements that come after an element.
Pseudo-selectors
Allow applying styles in specific states, like :hover, :active etc.
a:hover {
  color: red;
}
Calculations
Allow calculating values using the calc() function.
width: calc((100% / 3) - 10px)
Media queries
Allow defining specific styles for different screen sizes.
@media (max-width: 480px) {
}
Margin
Position
- Static: This is the default value of every HTML element, that is, it will follow the common flow of your page.
- Relative: Using Relative position the element starts to accept the Top, Bottom, Left and Right properties. With them you can change the positioning of the element.
- Absolute: The Absolute position is a great shortcut in CSS. With it you can position any element according to the parent element that has a position other than static.
- Fixed: The fixed position behaves similarly to absolute, ceasing to be part of the common page flow. But the big difference is that it starts to reference the window of your browser, that is, the area that appears to the user regardless of scroll bar.

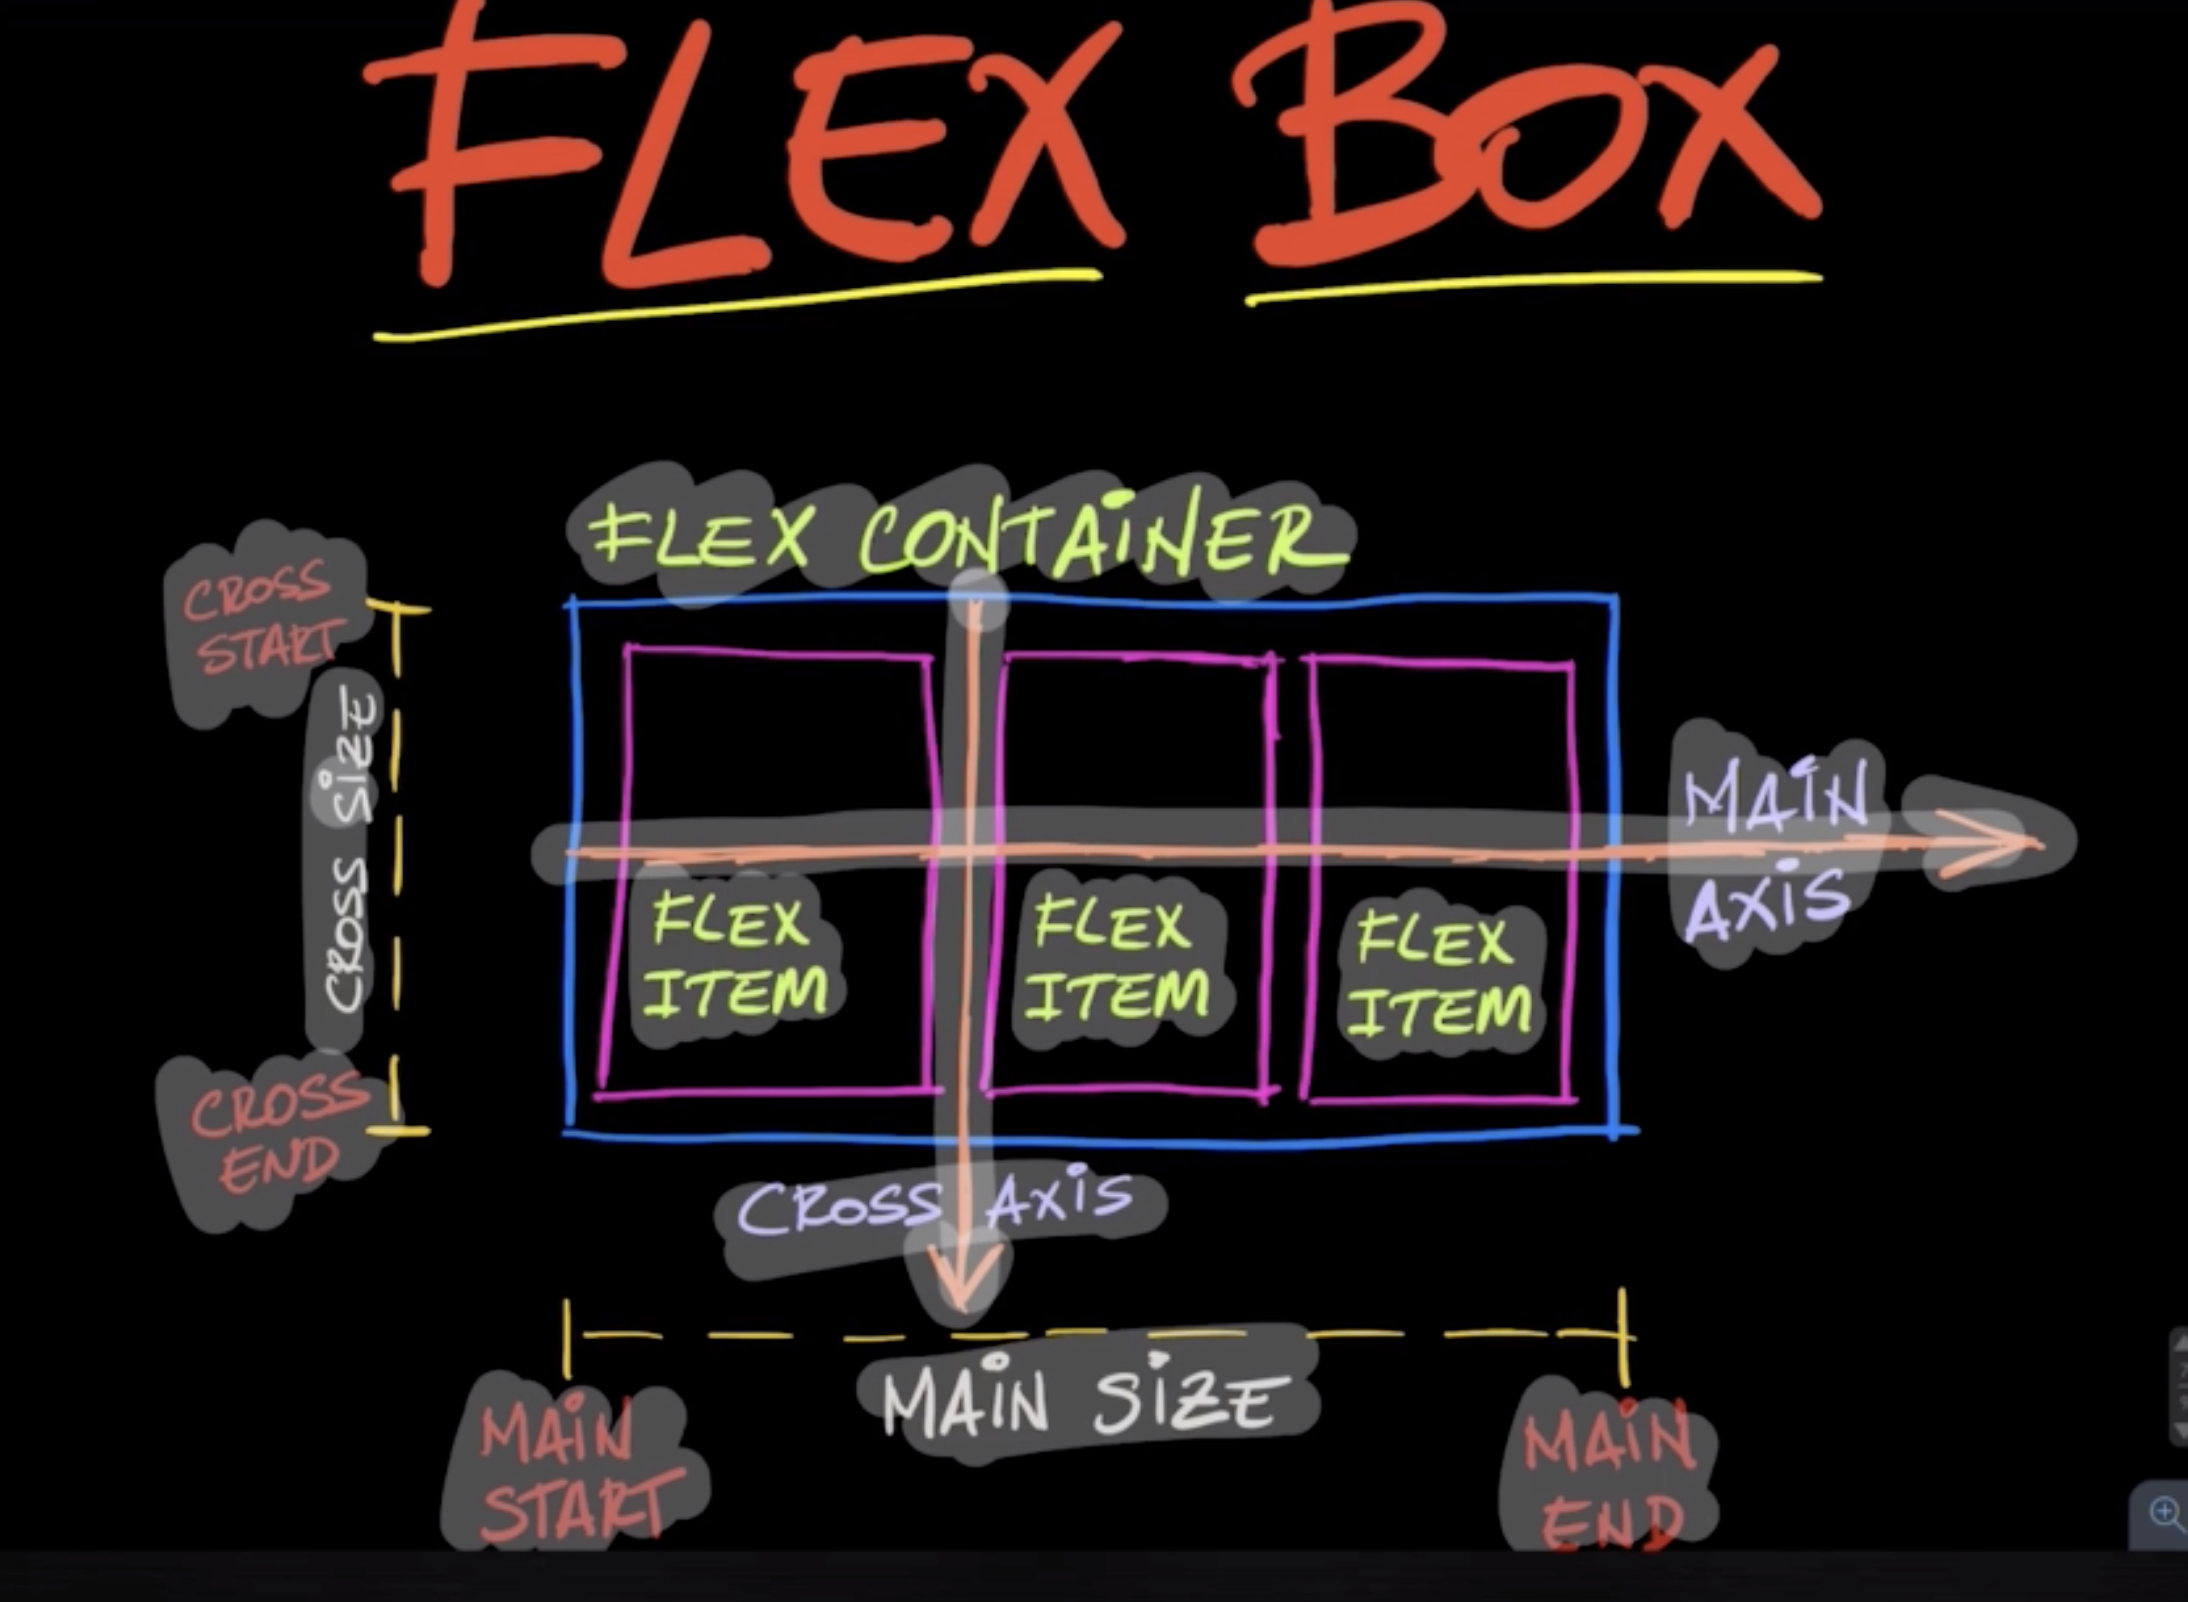
Flexbox

:is() selector
is() allows you to write compound selectors more shortly, making the code cleaner and easier to handle.
article › h1, article › h2 , article › h3 {
}
article › :is(h1, h2, h3) {
}
Javascript
Used to manipulate the DOM
- querySelector
Select by CSS selector
- document.querySelector('p').textContent = 'buy a strawberry'
- getElementById
Selects element by passed id
- document.getElementById('id')
- getElementsByClassName
Returns an array of elements by passed class name.
document.getElementsByClassName('class')
- getElementsByTagName returns an array of elements by passed tag name.
document.getElementsByTagName('tag')
- querySelectorAll Returns all selectors with the same name.
document.querySelectorAll(selector)
- insertBefore()
Inserts a node before an existing node in the DOM:
const newParagraph = document.createElement('p');
newParagraph.textContent = 'New paragraph!';

const section = document.querySelector('section');
const firstParagraph = section.querySelector('p');

section.insertBefore(newParagraph, firstParagraph);
- replaceChild()
Replaces a child node with another:
const newTitle = document.createElement('h1');
newTitle.textContent = 'New title';

const oldTitle = document.querySelector('h1');
const section = oldTitle.parentElement;

section.replaceChild(newTitle, oldTitle);
- removeChild()
Removes a child element from the DOM:
const button = document.querySelector('button');
const section = button.parentElement;

section.removeChild(button);
Others
- appendChild() - Inserts a child node at the end of the parent node
- cloneNode() - Clones a node
These are some of the main methods for manipulating DOM elements and nodes.
Learn more: https://abilioazevedo.com.br/posts/javascript
PWA - Progressive Web App
PWAs (Progressive Web Apps) are web apps that use modern technologies to deliver an experience similar to native apps. They are:
-
Progressive - Work for any user, regardless of chosen browser, as they are built with Progressive Enhancement as a core principle.
-
Responsive - Perfectly adapt to any screen size: desktop, mobile, tablet, etc.
-
Connectivity independent - Use Service Workers to work offline or with limited connectivity.
-
App-like - Look and feel like native apps, with app-like interactions and navigation.
-
Updatable - Content is always updated thanks to the use of Service Workers.
-
Re-engageable - Use features like push notifications to re-engage users.
-
Installable - Allow users to add them to the home screen, no need for an app store.
-
Linkable - Easily shared via URL, without complex install processes.
Performance
Website performance is extremely important to provide a good user experience. Some points that can help improve site performance:
Image optimization
- Compress images without significant quality loss. Formats like WebP and AVIF tend to have better compression.
- Reduce resolution of images larger than necessary.
- Use CDNs to host images and static files.
Minification and compression
- Minify HTML, CSS and JS to reduce file size.
- Enable GZip compression on the server.
Caching
- Set appropriate cache headers for static resources on the server.
- Effectively use browser caching.
Reduce requests
- Concatenate multiple CSS/JS files.
- Inline critical CSS/JS in page.
Delivery optimization
- Enable HTTP/2.
- Use CDN to distribute static content.
Monitor performance
- Regularly audit performance with PageSpeed Insights and Lighthouse.
- Create a performance budget and monitor with automated tools.
Following good practices like these from the start can guarantee high site performance. It is harder to optimize a slow site than to build with performance in mind.
Tools
- Test using PagesSpeed
- Lighthouse


