Creating a To-Do List API using Java Spring Boot


In this post, we'll walk through building a simple TODO list web application using Java and the Spring Boot framework. Spring Boot makes it easy to create stand-alone, production-grade applications with minimal setup. We'll use it to build a RESTful API and persist our data to an in-memory H2 database.
Prerequisites
Before we begin, make sure you have the following installed:
- Java 11+
- Maven 3+
- An IDE like VSCode or IntelliJ IDEA or Eclipse
You can use this guide
We'll also use the following key libraries and tools:
- Spring Boot - for building the web application
- Spring Data JPA - for interacting with the database
- H2 Database - an in-memory SQL database
- Maven - for managing dependencies
Project Setup
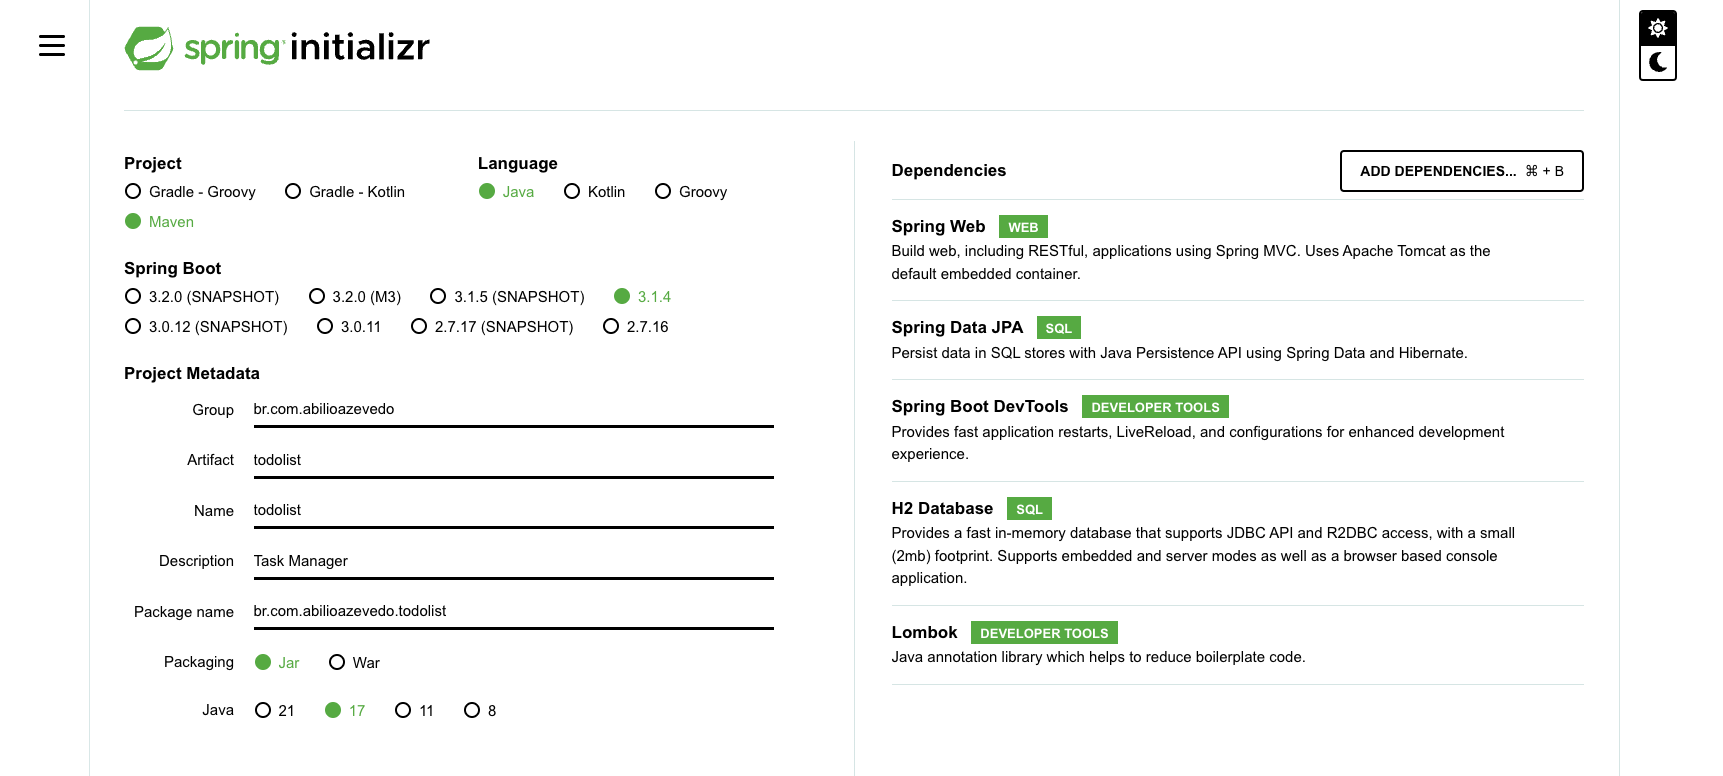
Let's start by generating our project on Spring Initializr. This gives us a basic Maven project with Spring Boot already configured.
Generate a Maven project with Java 17 Add Spring Web and Spring Data JPA dependencies Click Generate to download the project
Extract the downloaded project and open it in your IDE. The main application class is TodoApplication.java under src/main/java.
And your packages will be inside the folder structure that you put in Group, in my case I put br.com.abilioazevedo. So I will have the folders: src/main/java/br/com.abilioazevedo/todolist.
Creating User Module
Let's create the module to manage our users. We create a folder: src/main/java/br.com.abilioazevedo/todolist/user
First the Repository (IUserRepository.java) for communication with the database.
package br.com.abilioazevedo.todolist.user;
import java.util.UUID;

import org.springframework.data.jpa.repository.JpaRepository;

public interface IUserRepository extends JpaRepository<UserModel, UUID>{
UserModel findByUsername(String username);
}
After the model (UserModel.java)
package br.com.abilioazevedo.todolist.user;

import java.time.LocalDateTime;
import java.util.UUID;

import org.hibernate.annotations.CreationTimestamp;

import jakarta.persistence.Column;
import jakarta.persistence.Entity;
import jakarta.persistence.GeneratedValue;
import jakarta.persistence.Id;
import lombok.Data;

@Data
@Entity(name = "tb_users")
public class UserModel {

@Id
@GeneratedValue(generator = "UUID")
private UUID id;
@Column(unique = true)
private String username;
private String name;
private String password;

@CreationTimestamp
private LocalDateTime createAt;
}
And then the controller (UserController.java) to expose the endpoint to create the user:
package br.com.abilioazevedo.todolist.user;

import org.springframework.beans.factory.annotation.Autowired;
import org.springframework.http.HttpStatus;
import org.springframework.http.ResponseEntity;
import org.springframework.web.bind.annotation.PostMapping;
import org.springframework.web.bind.annotation.RequestBody;
import org.springframework.web.bind.annotation.RequestMapping;
import org.springframework.web.bind.annotation.RestController;

import at.favre.lib.crypto.bcrypt.BCrypt;

@RestController
@RequestMapping("/user")
public class UserController {

  @Autowired
  private IUserRepository userRepository;
  @PostMapping()
  public ResponseEntity create(@RequestBody UserModel userModel) {
    var user = this.userRepository.findByUsername(userModel.getUsername());
    if (user != null) {
      return ResponseEntity.status(HttpStatus.BAD_REQUEST).body("Usuário já cadastrado");
    }
    var passwordHashed = BCrypt.withDefaults().hashToString(12, userModel.getPassword().toCharArray());
    userModel.setPassword(passwordHashed);
    var userCreated = this.userRepository.save(userModel);
    return ResponseEntity.status(HttpStatus.CREATED).body(userCreated);
  }
}
Creating the authentication middleware
Now that we can create our user, we need to authenticate it and access the id in the task routes. For this, we will create a filter that will identify the basic auth parameters from the headers and search for the equivalent user.
Let's create the file filter/FilterTaskAuth.java:
package br.com.abilioazevedo.todolist.filter;

import java.io.IOException;
import java.util.Base64;

import org.springframework.beans.factory.annotation.Autowired;
import org.springframework.stereotype.Component;
import org.springframework.web.filter.OncePerRequestFilter;

import at.favre.lib.crypto.bcrypt.BCrypt;
import br.com.abilioazevedo.todolist.user.IUserRepository;
import jakarta.servlet.FilterChain;
import jakarta.servlet.ServletException;
import jakarta.servlet.http.HttpServletRequest;
import jakarta.servlet.http.HttpServletResponse;

@Component
public class FilterTaskAuth extends OncePerRequestFilter {

  @Autowired
  private IUserRepository userRepository;

  @Override
  protected void doFilterInternal(HttpServletRequest request, HttpServletResponse response, FilterChain filterChain)
      throws ServletException, IOException {

      var servletPath = request.getServletPath();
      if(!servletPath.startsWith("/task")){
        filterChain.doFilter(request, response);
        return;
      }
      var authorization = request.getHeader("Authorization");
      var authEncoded = authorization.substring("Basic".length()).trim();
      byte[] authDecoded = Base64.getDecoder().decode(authEncoded);
      var authString = new String(authDecoded);
      String[] credentials = authString.split(":");
      String username = credentials[0];
      String password = credentials[1];
      var user = this.userRepository.findByUsername(username);
      if (user == null) {
        response.sendError(401, "Usuário não encontrado");
      }else{
        var passwordHashed = user.getPassword();
        var passwordMatch = BCrypt.verifyer().verify(password.toCharArray(), passwordHashed).verified;
        if (!passwordMatch) {
          response.sendError(401, "Senha inválida");
        }else{
          request.setAttribute("userId", user.getId());
          filterChain.doFilter(request, response);
        }
      }
  }
}
Notice that the filter/middleware is only applied to routes starting with task.
Creating Task Module
Let's create the module to manage our tasks. We create a folder: src/main/java/br.com.abilioazevedo/todolist/task
First the Repository (ITaskRepository.java) for communication with the database.
package br.com.abilioazevedo.todolist.user;

import java.util.UUID;

import org.springframework.data.jpa.repository.JpaRepository;

public interface IUserRepository extends JpaRepository<UserModel, UUID>{
  UserModel findByUsername(String username);
}
This will handle all the CRUD operations for Todo entities and we are also adding a new function from the defaults ones findByIdUser
After, we can create the Task Model (TaskModel.java):
package br.com.abilioazevedo.todolist.task;

import java.time.LocalDateTime;
import java.util.UUID;

import org.hibernate.annotations.CreationTimestamp;

import jakarta.persistence.Column;
import jakarta.persistence.Entity;
import jakarta.persistence.GeneratedValue;
import jakarta.persistence.Id;
import lombok.Data;

@Data
@Entity(name = "tb_tasks")
public class TaskModel {

  @Id
  @GeneratedValue(generator = "UUID")
  private UUID id;

  @Column(length = 50)
  private String title;
  private String description;

  private UUID idUser;
  private LocalDateTime startAt;
  private LocalDateTime endAt;
  private String priority;
  private Boolean done;

  @CreationTimestamp
  private LocalDateTime createAt;

  public void setTitle(String title) throws Exception {
    if (title.length() > 50) {
      throw new Exception("O campo title deve conter no máximo 50 caracteres");
    }

    this.title = title;
  }
}
This is a JPA entity that will be persisted in the database. It has an auto-generated id, a title, description, the user id, when the task starts and ends, the priority and a flag to indicate completion.
Finally, we create the controller that will handle all the CRUD operations for Task entities (TaskController.java):
package br.com.abilioazevedo.todolist.task;

import java.time.LocalDateTime;
import java.util.UUID;

import org.springframework.beans.factory.annotation.Autowired;
import org.springframework.http.HttpStatus;
import org.springframework.http.ResponseEntity;
import org.springframework.web.bind.annotation.GetMapping;
import org.springframework.web.bind.annotation.PathVariable;
import org.springframework.web.bind.annotation.PostMapping;
import org.springframework.web.bind.annotation.PutMapping;
import org.springframework.web.bind.annotation.RequestBody;
import org.springframework.web.bind.annotation.RequestMapping;
import org.springframework.web.bind.annotation.RestController;

import br.com.abilioazevedo.todolist.utils.Utils;
import io.swagger.v3.oas.annotations.security.SecurityRequirement;
import jakarta.servlet.http.HttpServletRequest;

@RestController
@RequestMapping("/task")
@SecurityRequirement(name = "basicAuth")
public class TaskController {

  @Autowired
  private ITaskRepository taskRepository;

  @PostMapping()
  public ResponseEntity create(@RequestBody TaskModel taskModel, HttpServletRequest request) {
    var idUser = request.getAttribute("userId");
    taskModel.setIdUser((UUID) idUser);

    var currentDate = LocalDateTime.now();
    if(currentDate.isAfter(taskModel.getStartAt())){
      return ResponseEntity.status(HttpStatus.BAD_REQUEST).body("Data de início não pode ser menor que a data atual");
    }

    if(taskModel.getEndAt().isBefore(taskModel.getStartAt())){
      return ResponseEntity.status(HttpStatus.BAD_REQUEST).body("Data de fim não pode ser menor que a data de início");
    }

    var taskCreated = this.taskRepository.save(taskModel);
    return ResponseEntity.status(HttpStatus.CREATED).body(taskCreated);
  }

  @GetMapping()
  public ResponseEntity findAll(HttpServletRequest request) {
    var idUser = request.getAttribute("userId");
    var tasks = this.taskRepository.findByIdUser((UUID) idUser);
    return ResponseEntity.ok(tasks);
  }

  @PutMapping("/{id}")
  public ResponseEntity update(@RequestBody TaskModel taskModel, @PathVariable UUID id, HttpServletRequest request) {
    var task = this.taskRepository.findById(id).orElse(null);

    if (task == null) {
      return ResponseEntity.status(HttpStatus.BAD_REQUEST).body("Tarefa não encontrada");
    }

    var idUser = request.getAttribute("userId");

    if (!task.getIdUser().equals(idUser)) {
      return ResponseEntity.status(HttpStatus.BAD_REQUEST).body("Usuário não tem permissão para alterar essa tarefa");
    }

    Utils.copyNonNullProperties(taskModel, task);
    var taskUpdated = this.taskRepository.save(task);
    return ResponseEntity.ok().body(taskUpdated);
  }
}
This will expose the endpoints to create, read, update and delete tasks.
NOTE: You can see we are using the following function Utils.copyNonNullProperties, it serves to combine the non-null properties of the two objects, its code is in the final repository here.
Setting up Spring Data JPA
Next, we need to configure Spring Data JPA to connect to our database.
Open src/main/resources/application.properties and add the following:
spring.datasource.url=jdbc:h2:mem:todolist
spring.datasource.driverClassName=org.h2.Driver
spring.datasource.username=admin
spring.datasource.password=admin
spring.jpa.database-platform=org.hibernate.dialect.H2Dialect
spring.h2.console.enabled=true
This configures an in-memory H2 database that will be automatically populated from our entities.
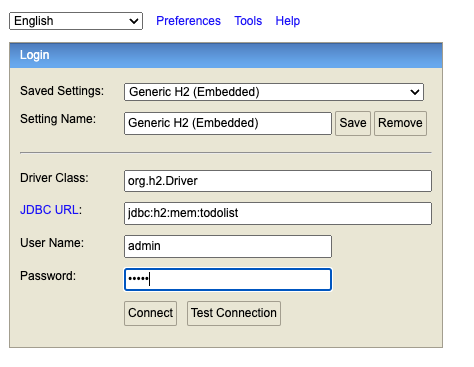
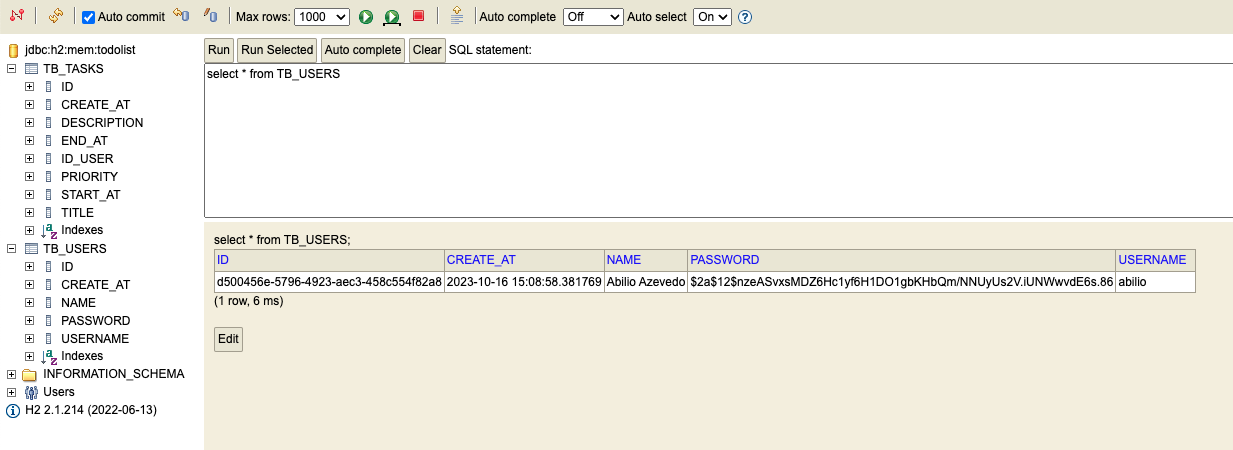
DB CONSOLE
You can access the H2 console:
localhost:8080/h2-console
Testing the API
Our basic API is now ready! Let's test it out.
Start the application by running this command:
mvn spring-boot:runThen you can send requests to: POST /api/v1/todos - Create a new todo GET /api/v1/todos - Get all todos PUT /api/v1/todos/{id} - Update a todo DELETE /api/v1/todos/{id} - Delete a todo
You can use Postman or CURL to test these endpoints. Or using swagger by accessing: http://localhost:8080/swagger-ui/index.html
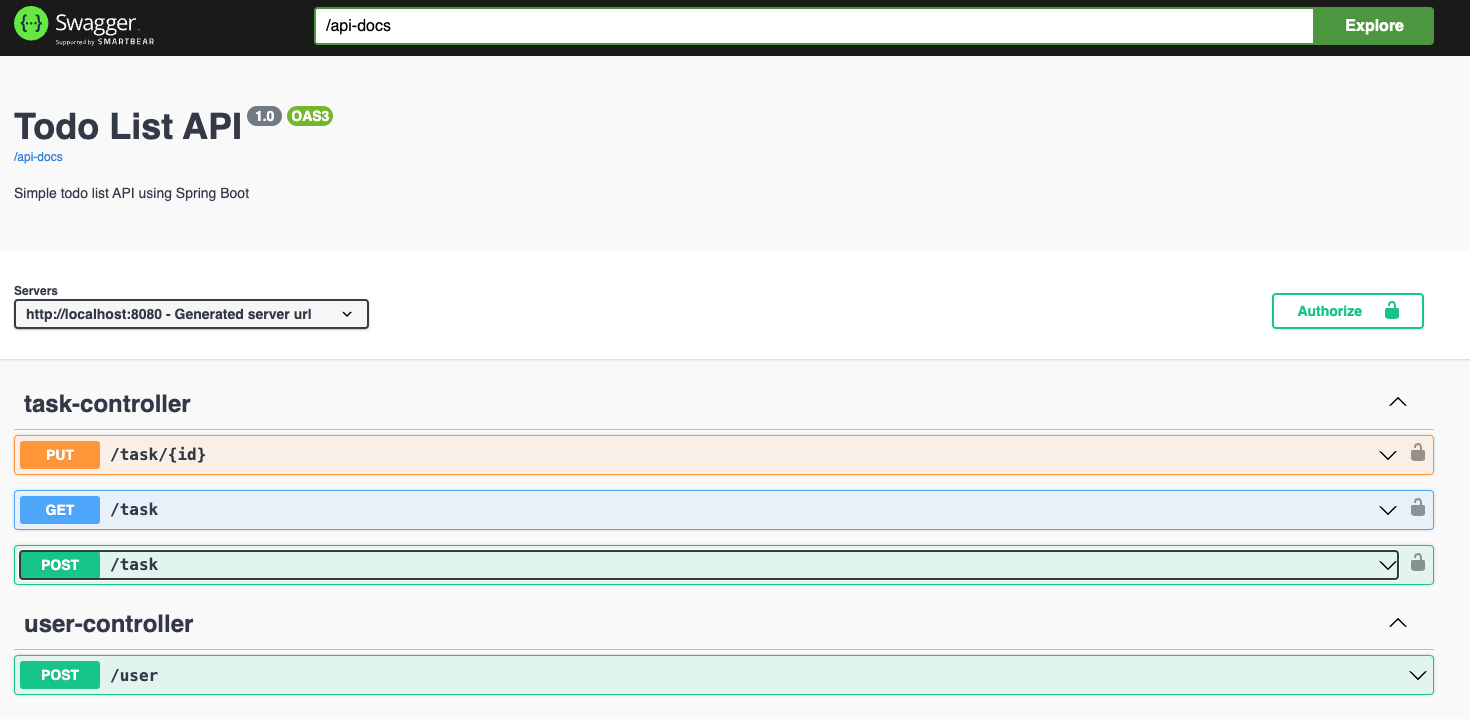
NOTE: You can see the swagger configuration in the final project repository here.
Deploy it
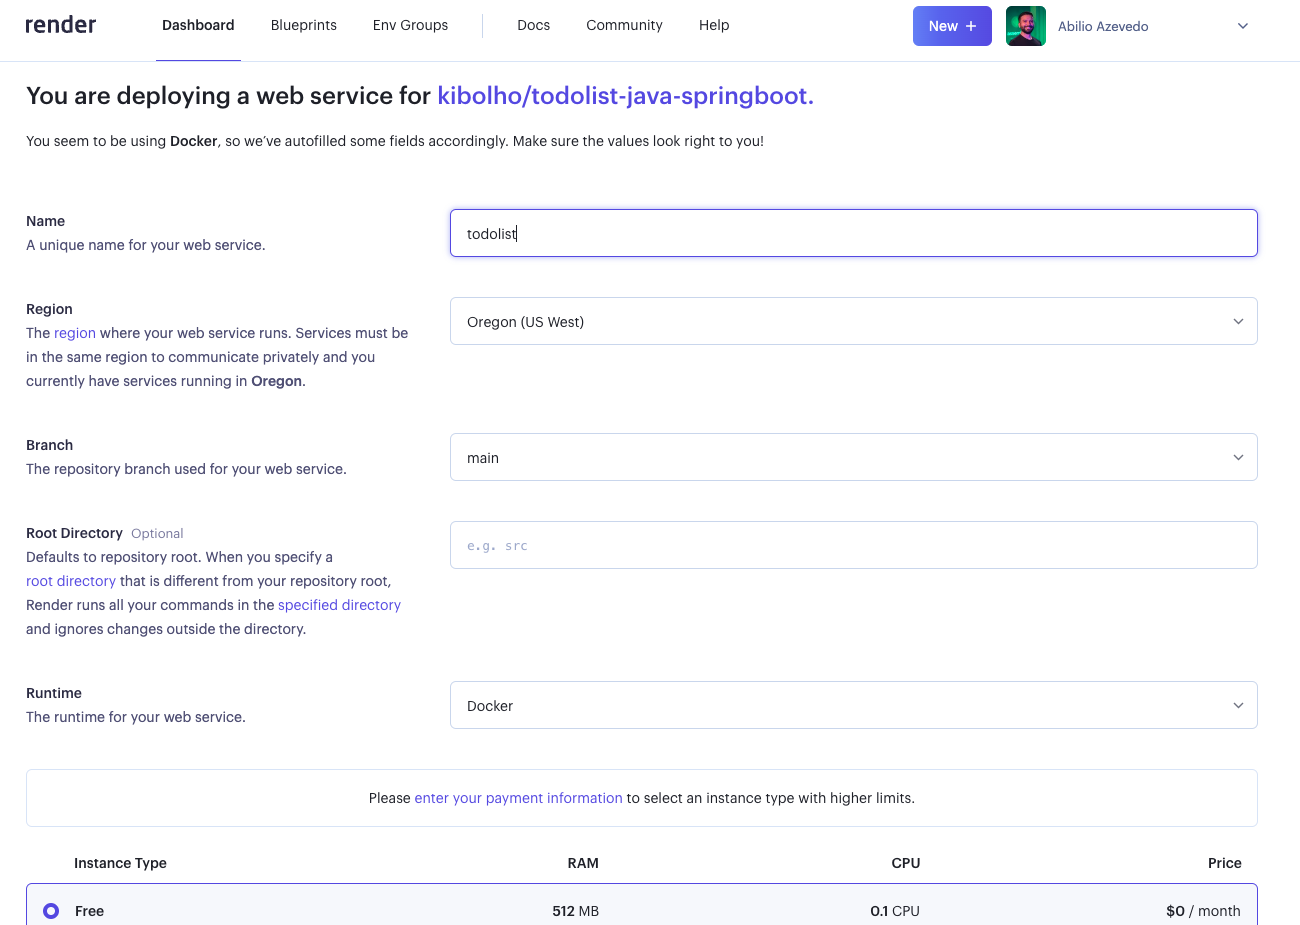
You can use https://render.com/ to deploy your application, you just need to connect your repository and deploy it using Docker.
-
Access the render to create your web application: https://dashboard.render.com/create?type=web
-
You will have your application running:
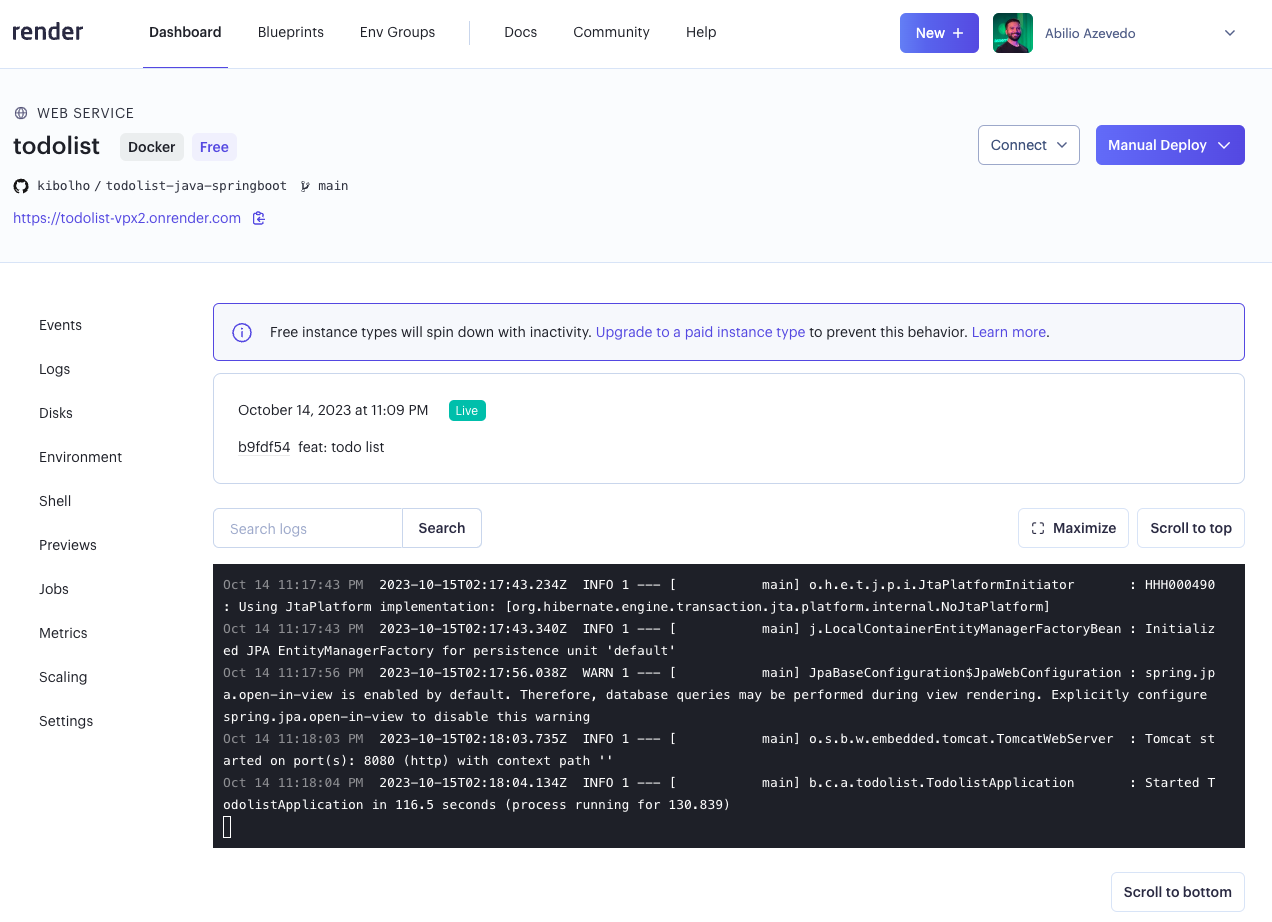


You can test it here
Summary
In this post, we built a simple TODO list app in Java using Spring Boot, Spring Data JPA, and H2. The key steps were:
- Setting up the project with Spring Initializr
- Creating a Todo JPA entity
- Configuring Spring Data JPA
- Building a REST controller
- Testing the CRUD API endpoints The full code is available on GitHub.
This is just a basic example, but you can extend it by adding more models, business logic, and other features. Spring Boot and Spring Data make it easy to focus on the application logic rather than infrastructure concerns.